Last week was my wife’s birthday, so a special cake was called for. We had been to Argentina a few months back, and had a jar of genuine dulce de leche we had yet to use, so she requested that figure in, and she wanted it light (oops) and a bit fruity.
After a bit of research, I settled on a recipe I found HERE. Sort of. In making a test batch I realized the recipe was incomplete. In one step it said ‘add the sugar’, but there wasn’t any sugar listed in ingredients. There had been ‘glucose’ (for which I substituted light corn syrup) so I assumed it was that. But then I got to a later step, and you guessed it, needed the glucose. So clearly something was wrong. I referred to the Bouchon Bakery cookbook that the recipe was inspired from, and found the Madeleine Cake recipe that was clearly the inspiration. It called for 180g of sugar, so I used that much..
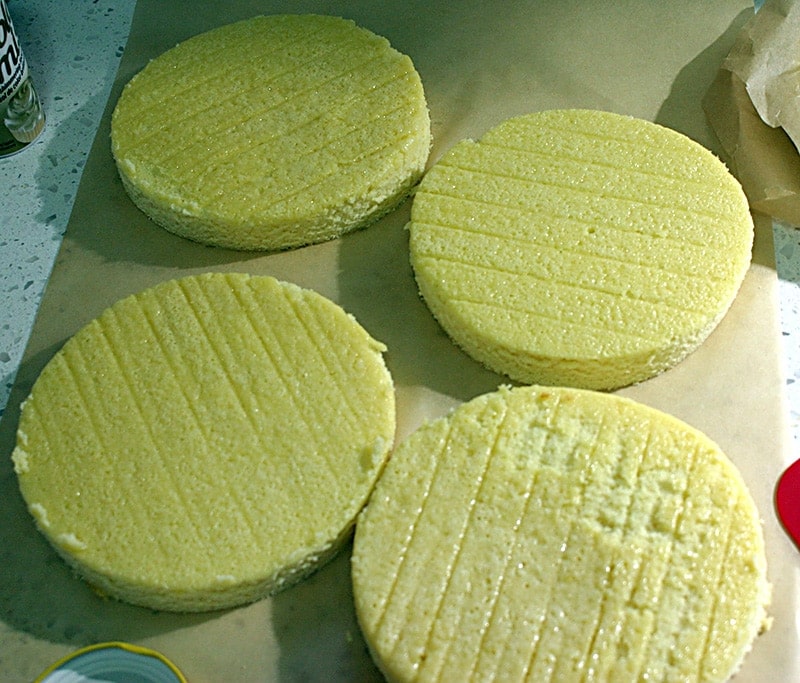
But then, the cake I made ended up not rising at all, I had like a 1/4 inch cake. Even at 6 layers, that was clearly not correct. So I ended up tossing out the blog’s cake recipe and using the the straight Bouchon Bakery recipe, simply substituting satsuma juice for the lemon juice in the book’s recipe. The book recipe called for less juice, more flour, and it rose and fluffed up just as I’d hoped..
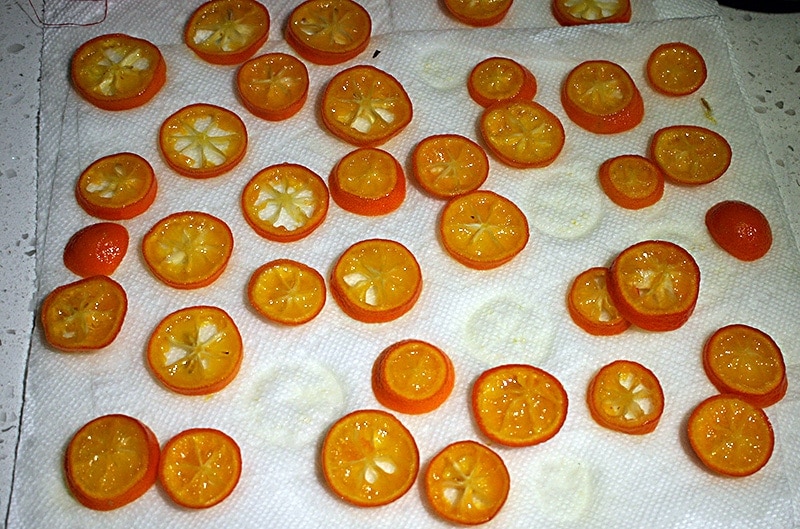
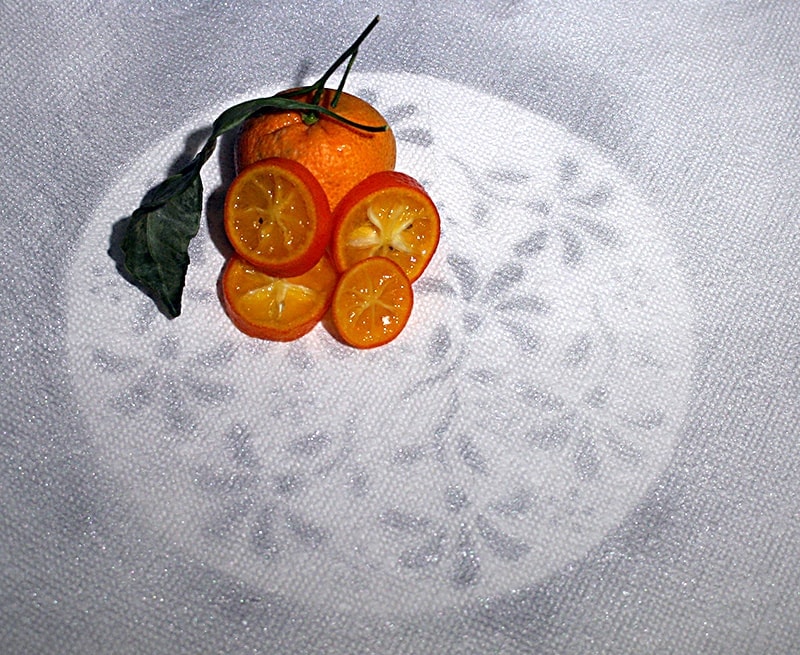
A few days prior, I made some candied kumquats to be used as decoration on the cake. Basically, sliced up some kumquats and put them in a mason jar filled with simple syrup. While the cake rounds cooled in the fridge I spread out the slices on some paper towels to dry a bit.
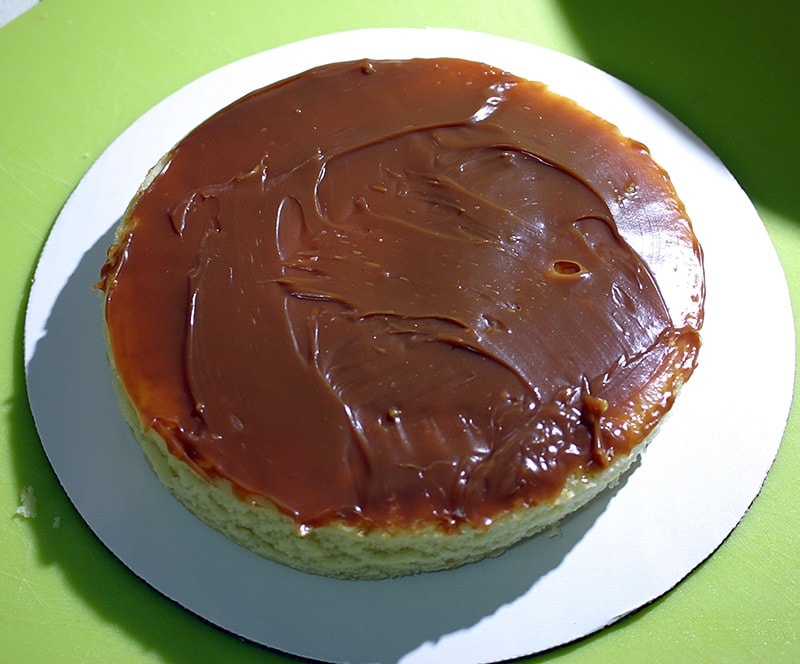
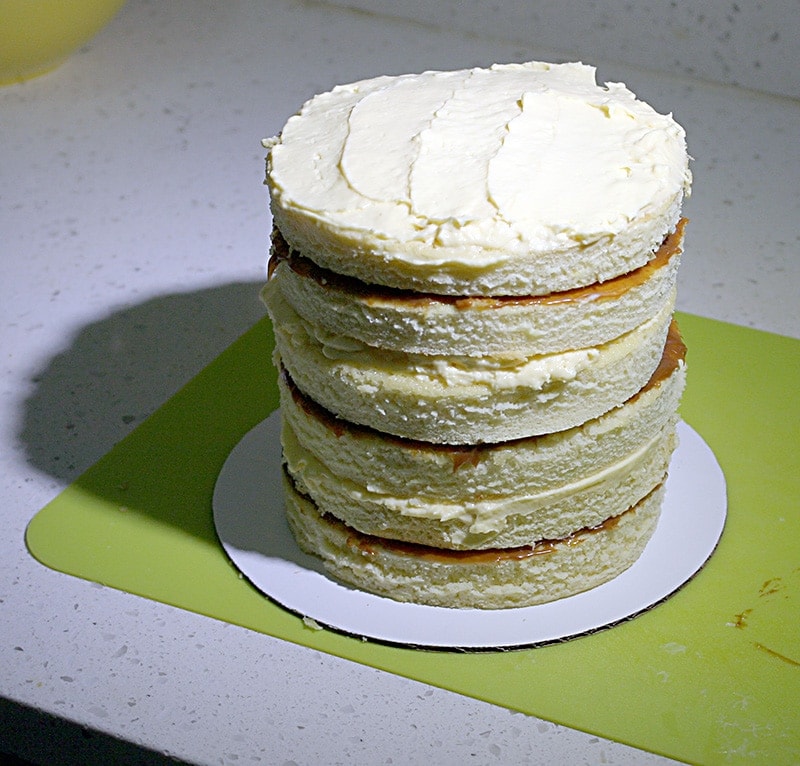
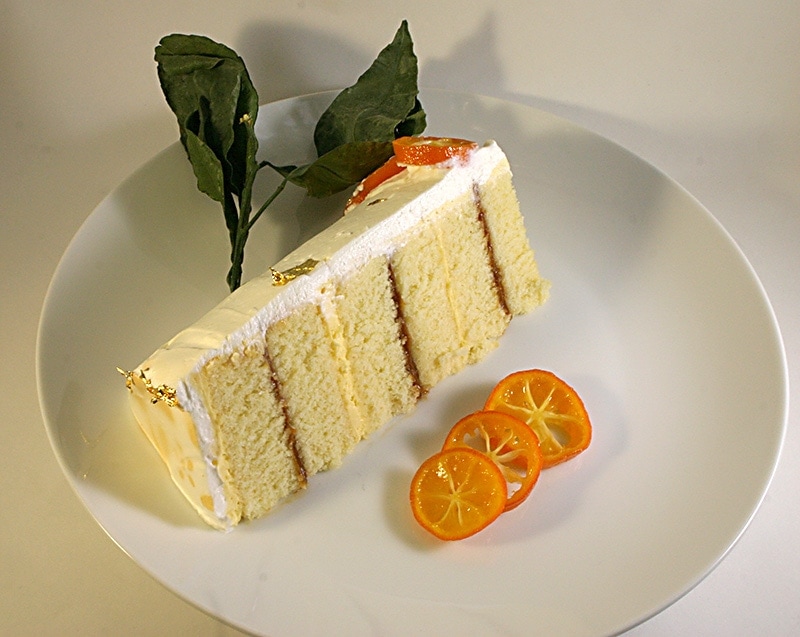
I frosted layers of the cake with alternating dulce de leche and satsuma curd, until I had a cake 6 layers high.
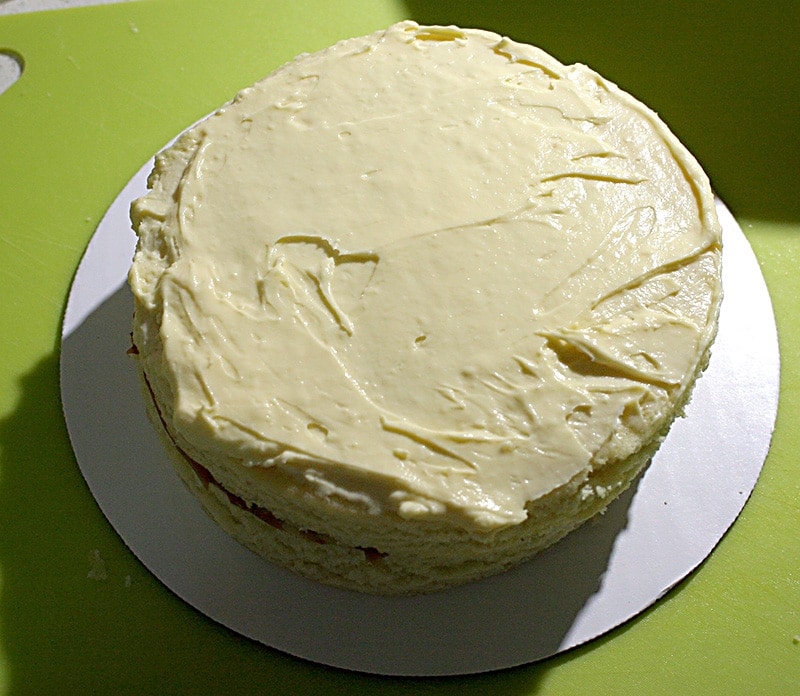
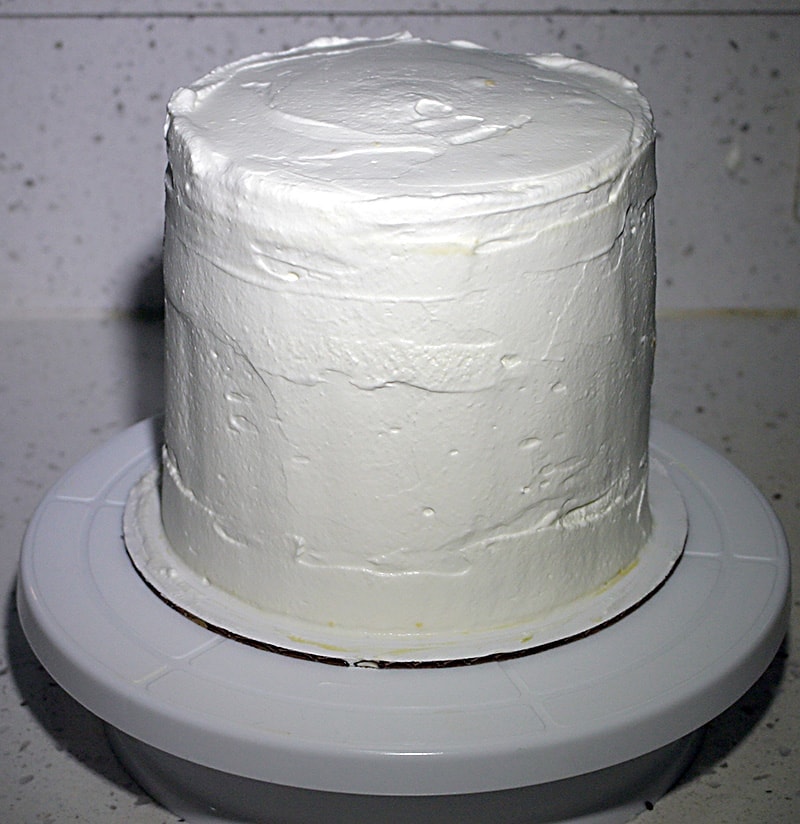
The I used the remaining curd for a crumb coat around the whole cake. After letting that cool for a bit in the fridge I covered the whole cake in home made whipped cream. The original recipe called for butter cream but my wife wanted a lighter and less sweet cake.
While the covered cake cooled in the fridge I did some test mockups of decorations using paper towels for stand in cake tops.
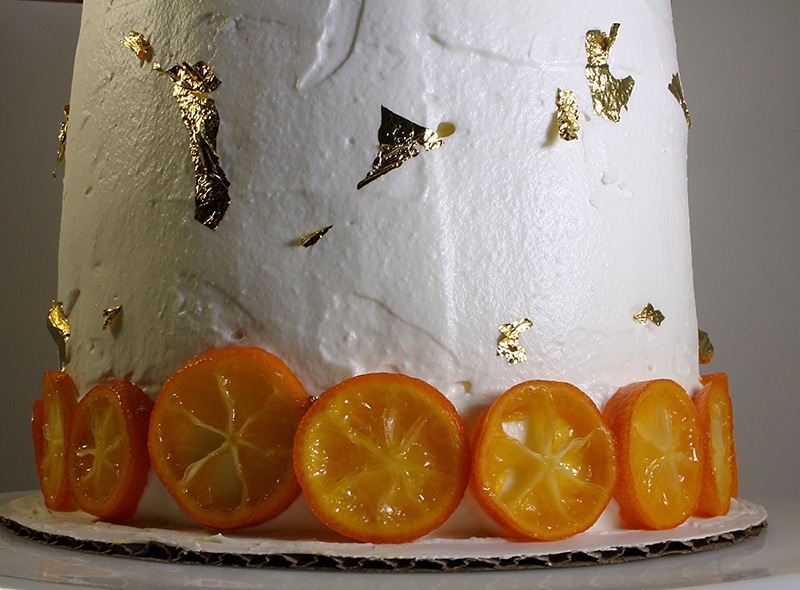
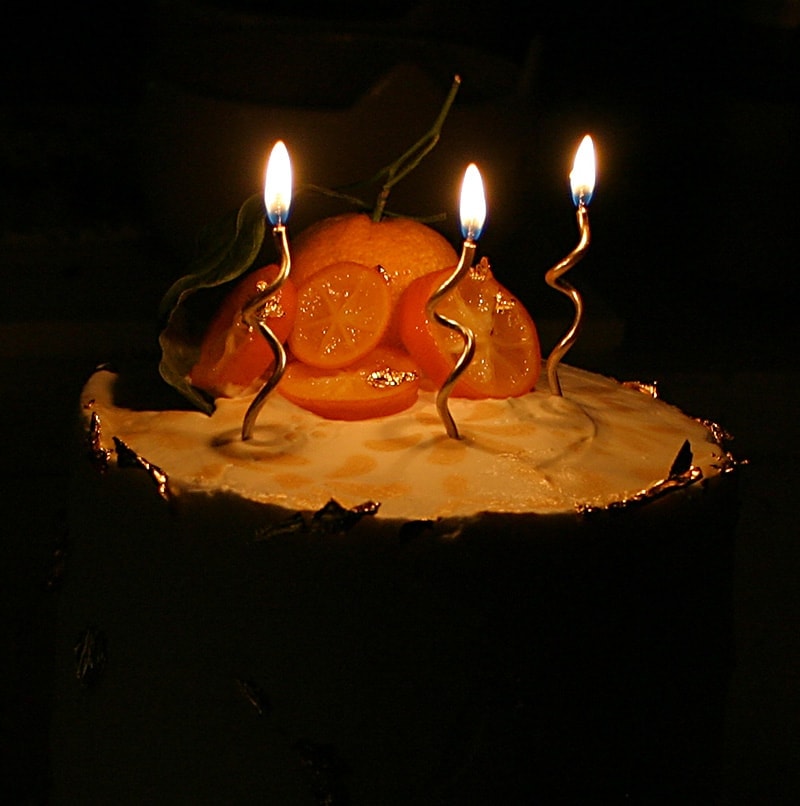
Then I decorated. I used a stencil and edible glitter spray to paint a pattern on the top. Placed a whole satsuma surrounded by some candied kumquat slices, and used some leaves from the fruit to accent it. Lastly a bunch of edible gold leaf (that I had never used before and was a pain to work with) spread around.
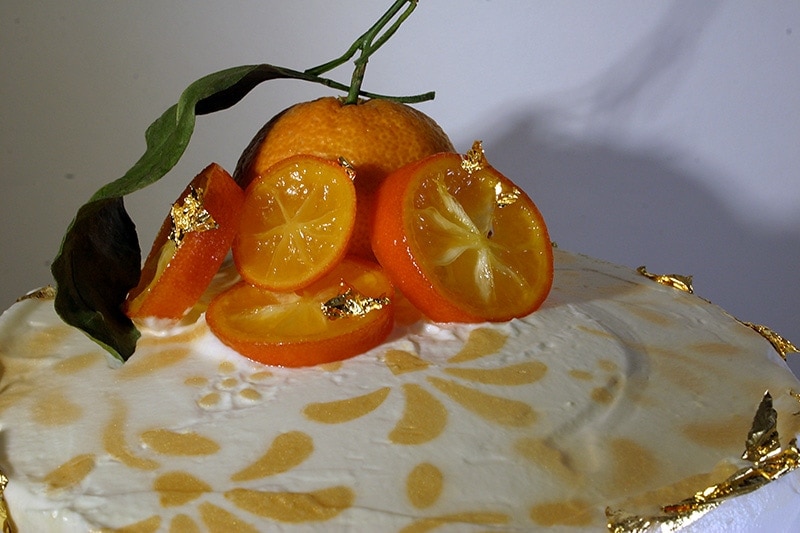
The rest of the cake was kept pretty simple, a ring of kumquat slices around the bottom, and some edible gold leaf placed haphazardly here and there.
Lastly, since it was a birthday cake, we needed some candles for the singing of Happy Birthday.
Finally, after about 3 days work, it was ready to slice and serve. Voila!
It was a huge hit. If I were to make it again I’d be less afraid of the dulce to delche. I didn’t want to use too much and overpower everything, but actually more would have been nice. Other than that I was quite happy with the results, and so was my wife.
Satsuma Curd Dulce de Leche Cake
Ingredients
Cake
- 188 g All-purpose Flour
- 1 1/2 tsp Baking Powder
- 4 Eggs
- 180 g Granulated Sugar
- 112 g Glucose (I used light corn syrup)
- 75 g Unsalted Butter
- 38 g Whole Milk
- 75 g Satsuma Juice (or regular mandarins if you cant get satsuma)
Candied Kumquats
- 2 parts Sliced Kumquats (deseed)
- 3 parts Sugar
- 3 parts Water
Satsuma Curd
- 150 g Eggs
- 75 g Granulated Sugar
- 125 g Fresh Satsuma Juice
- 25 g Fresh Lemon Juice
- 195 g Unsalted Butter
- 2 g Gelatin Sheets
Whipped Cream
- 2 cups Whipping Cream
- 1 cup Confectioner’s Sugar
Instructions
Candied Kumquats
- This was the simplest part of the recipe. Just slice up the kumquats and remove the seeds.Mix the water and the sugar and heat until combined fully. Put the kumquats in a mason jar or similar, and pour in the syrup. I made it a couple days in advance and left it in the fridge once cooled.
Satsuma Curd
- This was the hardest part.. First, I had to find satsumas. Found them in the third grocery store I tried (Trader Joe’s). Then I had to get some gelatin sheets, which I had never used before. Got those off Amazon.First step, cut the gelatin sheets in ~1 inch strips and place them in cold water to start to soften.
- Combine the eggs, sugar, and juices in either a double boiler, or a glass bowl set over a pot of simmering water. Cook, whisking constantly, until it has thickened and a thermometer in it reads 82C.
- Let it cool for about a minute, while whisking. Squeeze the water out of the softened gelatin and add it to the curd, whisking for about another minute until it is dissolved. Strain the curd through a very fine strainer.
- Use an immersion blender on low to mix in all the butter slowly, a few pieces at a time. Once all the butter is incorporated the curd is ready. You can use it immediately or refrigerate. I made it the day before and put a sheet of plastic rap on the surface of the curd to stop it from forming a skin.
The Cake
- Instead of baking rounds, bake a sheet cake and cut rounds with a 6 inch cutter. The recipe in the Bouchon Bakery book fills a quarter sheet pan. Since I wanted 6 layers I made 2 batches and filled 2 1/4 sheet pans. I could only get 3 rounds per sheet with the cutter I had.The cake is pretty straightforward..
- Sift flour and baking powder into a medium bowl.Place eggs and sugar in the bowl of a stand mixer and whisk on low for a minute. Then turn up the speed and mix for 5-10 more minutes until the mixture is thick and pale yellow.
- Place the butter and glucose in a small pan over medium heat. Melt the butter and combine. Remove from the heat and whisk in the milk. Let it cool until it is just warm to the touch.Whisk 1/4 of the egg mixture into the glucose mixture, along with the satsuma juice.Add half the dry ingredients into the mixer bowl while whisking. Once combined, add the other half of the dry and allow to mix fully.Now pour in 1/4 of the glucose mixture and let it combine. Do this 3 more times until everything is combined in the mixer bowl.
- Prepare a 1/4 sheet pan. I sprayed the inside with Pam, put down a sheet of parchment, then sprayed the parchment with Pam. Pour in the batter and even out with a spatula. Cook at 350F for 24 minutes. Once it’s done let it cool on a rack, and then in the fridge for 30 minutes to make it easier to cut into rounds.
Whipped Cream
- Combine the sugar and the cream. Whip.That’s why it’s called “whipped cream”.
Putting it Together
- Spread a layer of dulce de leche on the first round. Add another round on top, and spread the curd on that one. Repeat, alternating, until you have 6 layers. Once you have the 6 layers stacked, use the remaining curd to crumbcoat the entire thing, and put it in the fridge.
- After it cools about 30 minutes, “frost” the entire thing with whipped cream. Make a ring around the base with the candied kumquats, and go to town decorating as you wish!
Pingback: Strawberry Yuzu Birthday Cake - Baked And Churned