Blog

  • Homemade Krimpets

    Homemade Krimpets

    I made homemade krimpets!! I love krimpets, they have a special place in my heart from a time in my life some years back. It’s a long story that I won’t get in to, but suffice it to say there was a time where they were very much my comfort snack of choice.

    In case you aren’t familiar with krimpets, they are a small snack sponge cake made by Tastycake. They come in a few different varieties, but everyone knows butterscotch is the king.

    Butterscotch Krimpets
    Genuine Tastycake
    Butterscotch Krimpets

    Now, when lockdown first hit, I made sure to get a box of krimpets.. I greatly overestimated how long I would be able to ration out a single box. It was gone within a couple of days, and I haven’t found more since. So, I decided to try and make my own. What could be better than homemade krimpets?

    The recipe I used came from the blog Good. Food. Stories. and in turn from the author, Casey Barber’s, book, Classic Snacks Made From Scratch, which I ended up getting after trying this recipe. This was the best homemade krimpets recipe I found.

    Krimpets

    Home made krimpets.

    Cakes

    • 1 1/4 cups All Purpose Flour
    • 1/2 cup Granulated Sugar
    • 1/2 cup Light Brown Sugar
    • 2 tsp Baking Powder
    • 1/4 tsp Kosher Salt
    • 1/4 cup Vegetable Oil
    • 1/4 cup Cold Water
    • 1 tsp Vanilla
    • 3 large Eggs (Separated)
    • 1/4 tsp Cream of Tartar

    Butterscotch Frosting

    • 6 tbsp Unsalted Butter (Room Temperature)
    • 1/2 cup Light Brown Sugar
    • 1/3 cup Heavy Cream
    • 1 tsp Vanilla
    • 1/2 tsp Kosher Salt
    • 2 cups Confectioner's Sugar
    1. Preheat the oven to 350 degrees F. Spritz 2 canoe pans with nonstick baking spray.

    2. Whisk the flour, granulated and brown sugar, baking powder, and salt together in a large bowl until no lumps remain.

    3. Whisk the oil, water, vanilla, and egg yolks together in a separate bowl. Stir into the dry ingredients and set aside.

    4. With an electric hand mixer or stand mixer fitted with the whisk attachment, whip the egg whites into stiff peaks on medium-high speed, adding the cream of tartar once the egg whites are frothy.

    5. Gently fold the egg whites into the batter, working slowly to incorporate them evenly.

    6. Pour the batter into the prepared canoe pans, filling each well only halfway.

    7. Bake for 18-20 minutes until the cakes are golden brown and a tester inserted into the center of a cake comes out clean.

    8. Cool the cakes for 10 minutes on a wire rack.

    9. Line the rack with waxed paper and lightly spritz the paper with more nonstick baking spray. 

    10. Carefully remove the cakes from the baking pans and cool completely on the waxed paper-lined rack.

    Frosting

    1. First you make the butterscotch.. Melt 2 tablespoons butter over medium-low heat in a high-sided, heavy-bottomed pan at least 1 quart in volume.

    2. Add the brown sugar and stir occasionally with a silicone spatula or wooden spoon for about 2-3 minutes. The sugar will change from sandy and granular to shiny and light toffee in color as it cooks.

    3. Carefully stir in the cream—it will hiss and steam as it hits the hot sugar. 

    4. Continue to cook, stirring frequently, for about 5 minutes more. The butterscotch will thicken and the bubbles will become glossy and fluffy.

    5. Remove from the heat and carefully pour into a large bowl or the (clean) bowl of your stand mixer.

    6. At this point you have your butterscotch. Let it cool for 10-15 minutes. You want it lukewarm for the next steps.

    7. Stir in the vanilla extract and salt.

    8. With an electric hand mixer or the stand mixer paddle attachment, beat in the remaining 4 tablespoons butter, then the confectioner's sugar, until light and fluffy. Now you basically have butter(scotch) cream frosting.

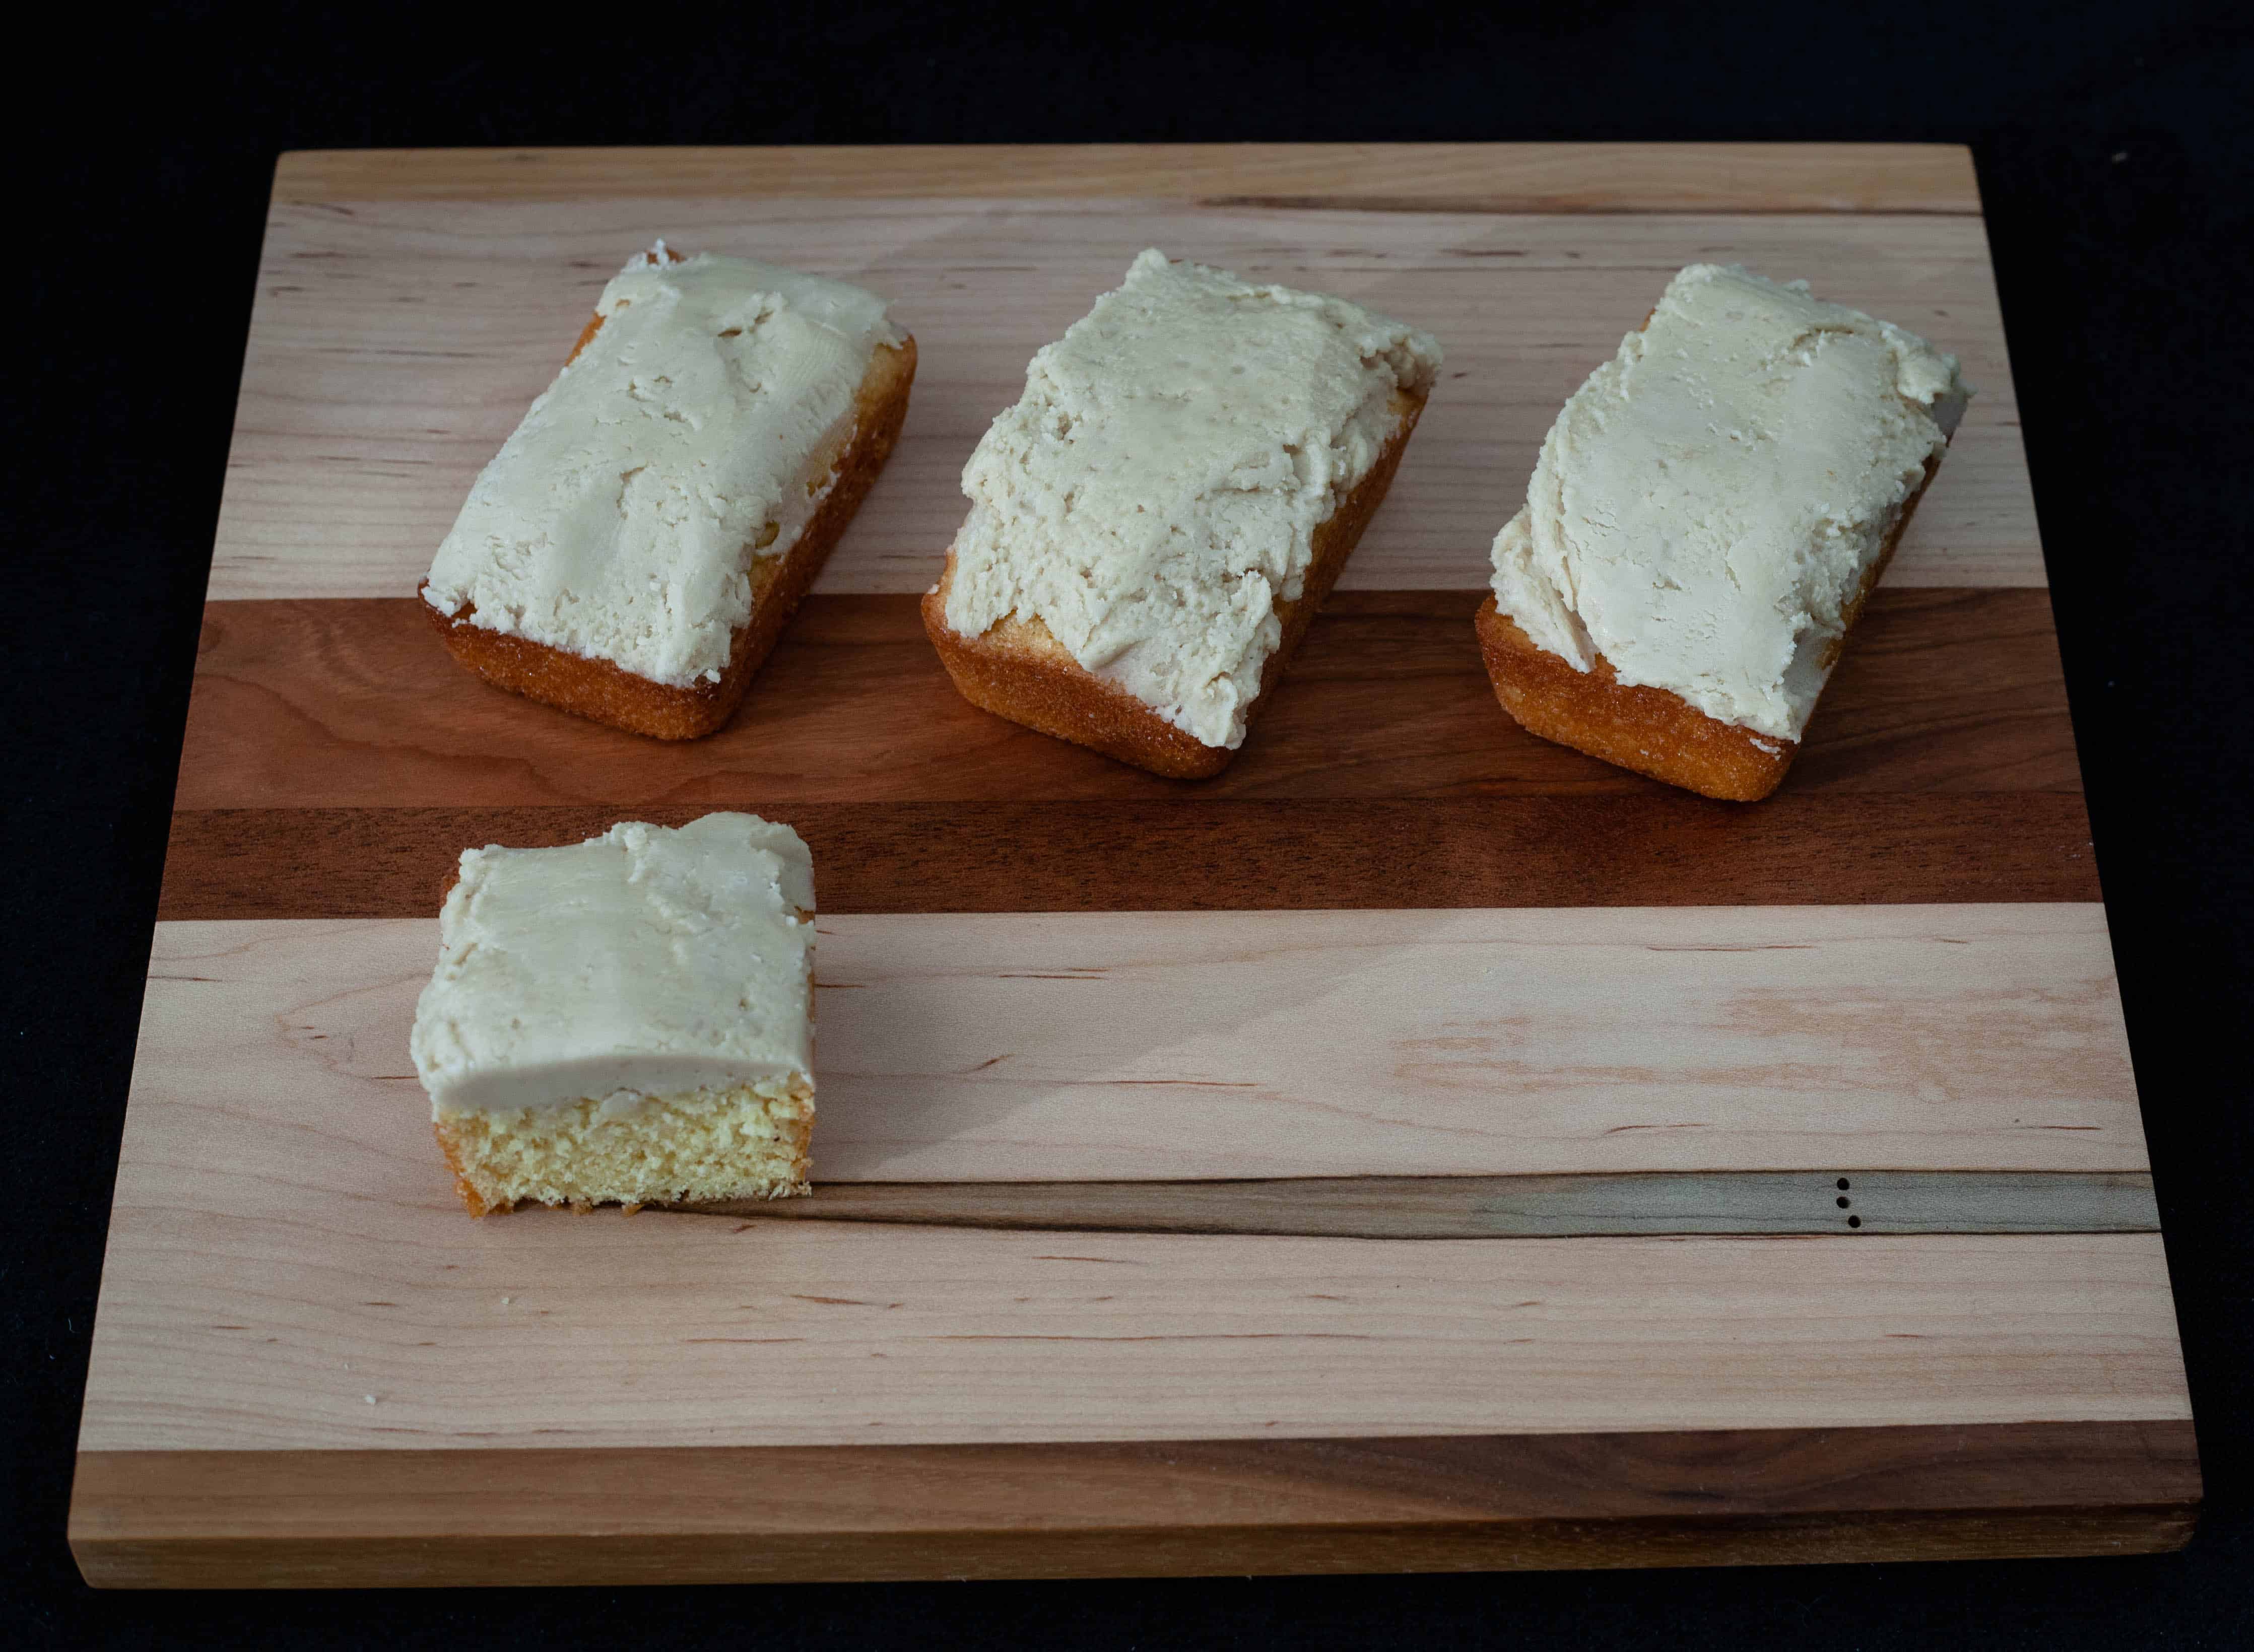
    9. Flatten the cakes by slicing off the top where they rose, then frost.
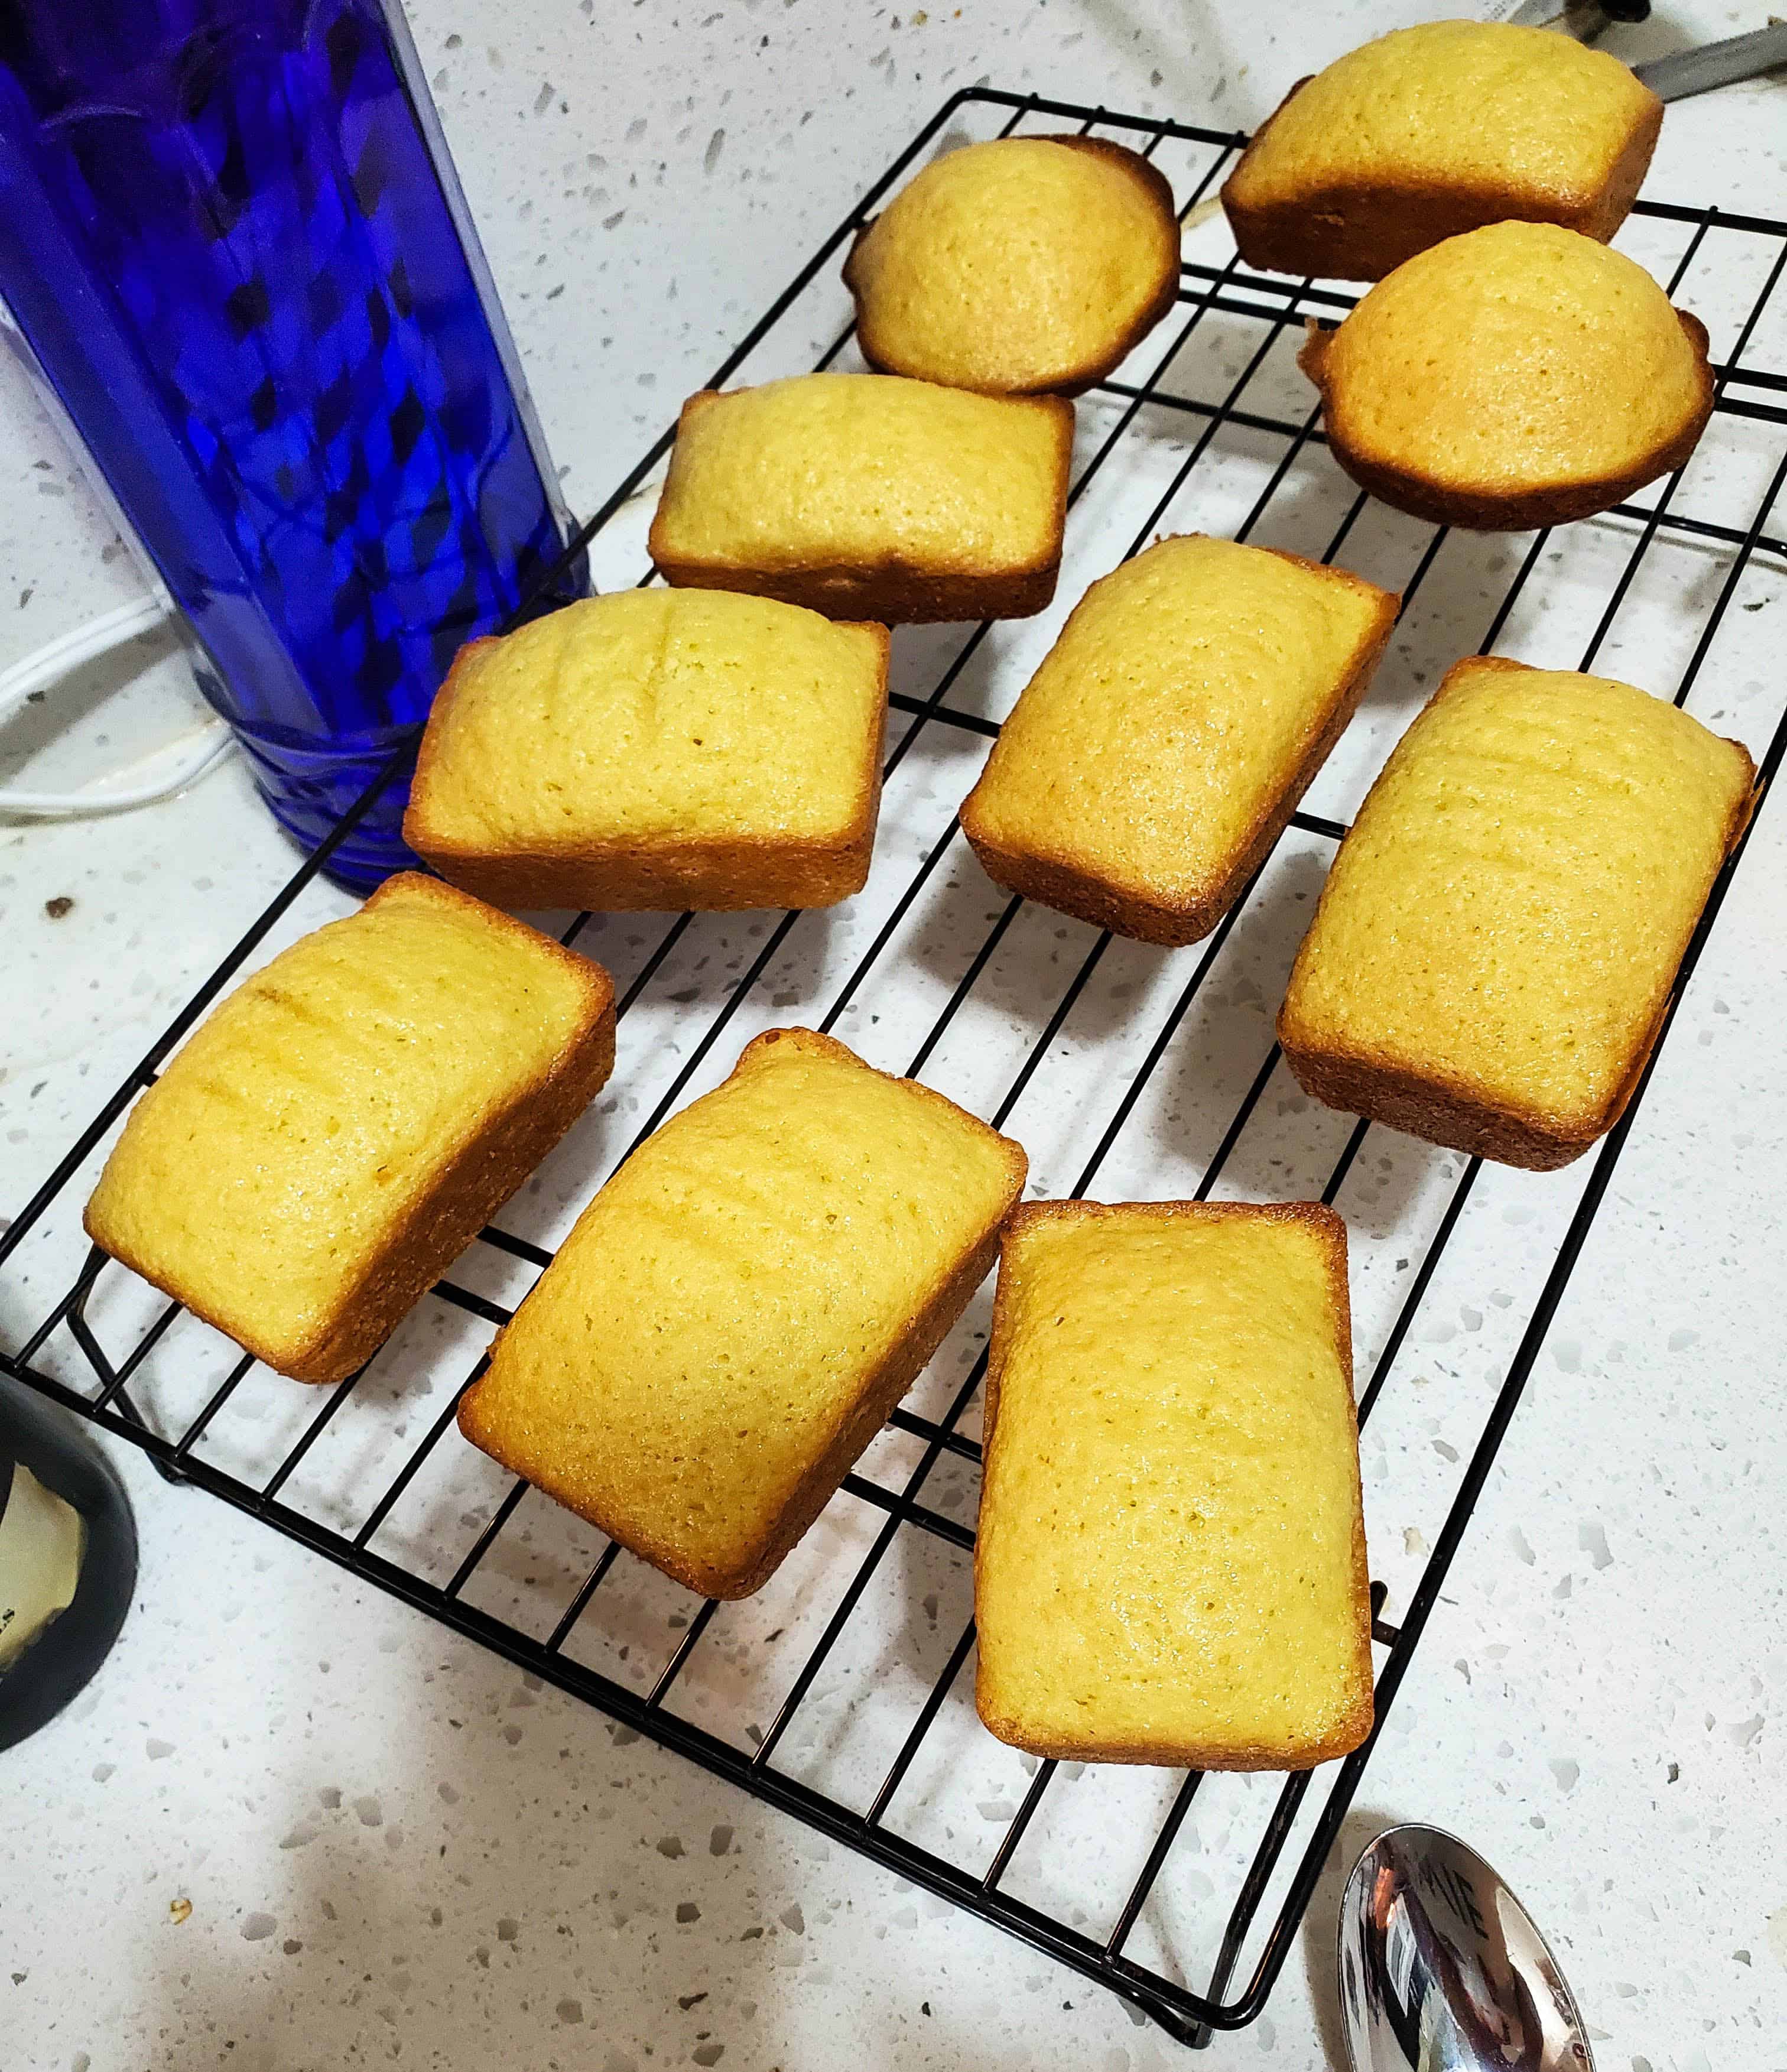
    The Cakes

    Making the cakes was pretty straightforward. They were nice and fluffy thanks to the egg whites. The only problem I had was, I realized I didn’t really have an appropriate pan. The recipe calls for a canoe pan, which I think is really more twinkie than krimpet, but anyway, I don’t have one. I do have a mini loaf pan, so I went with that. I had a little extra batter, so I also made 2 muffin shaped cakes.

    The Cakes
    The unfrosted cakes.

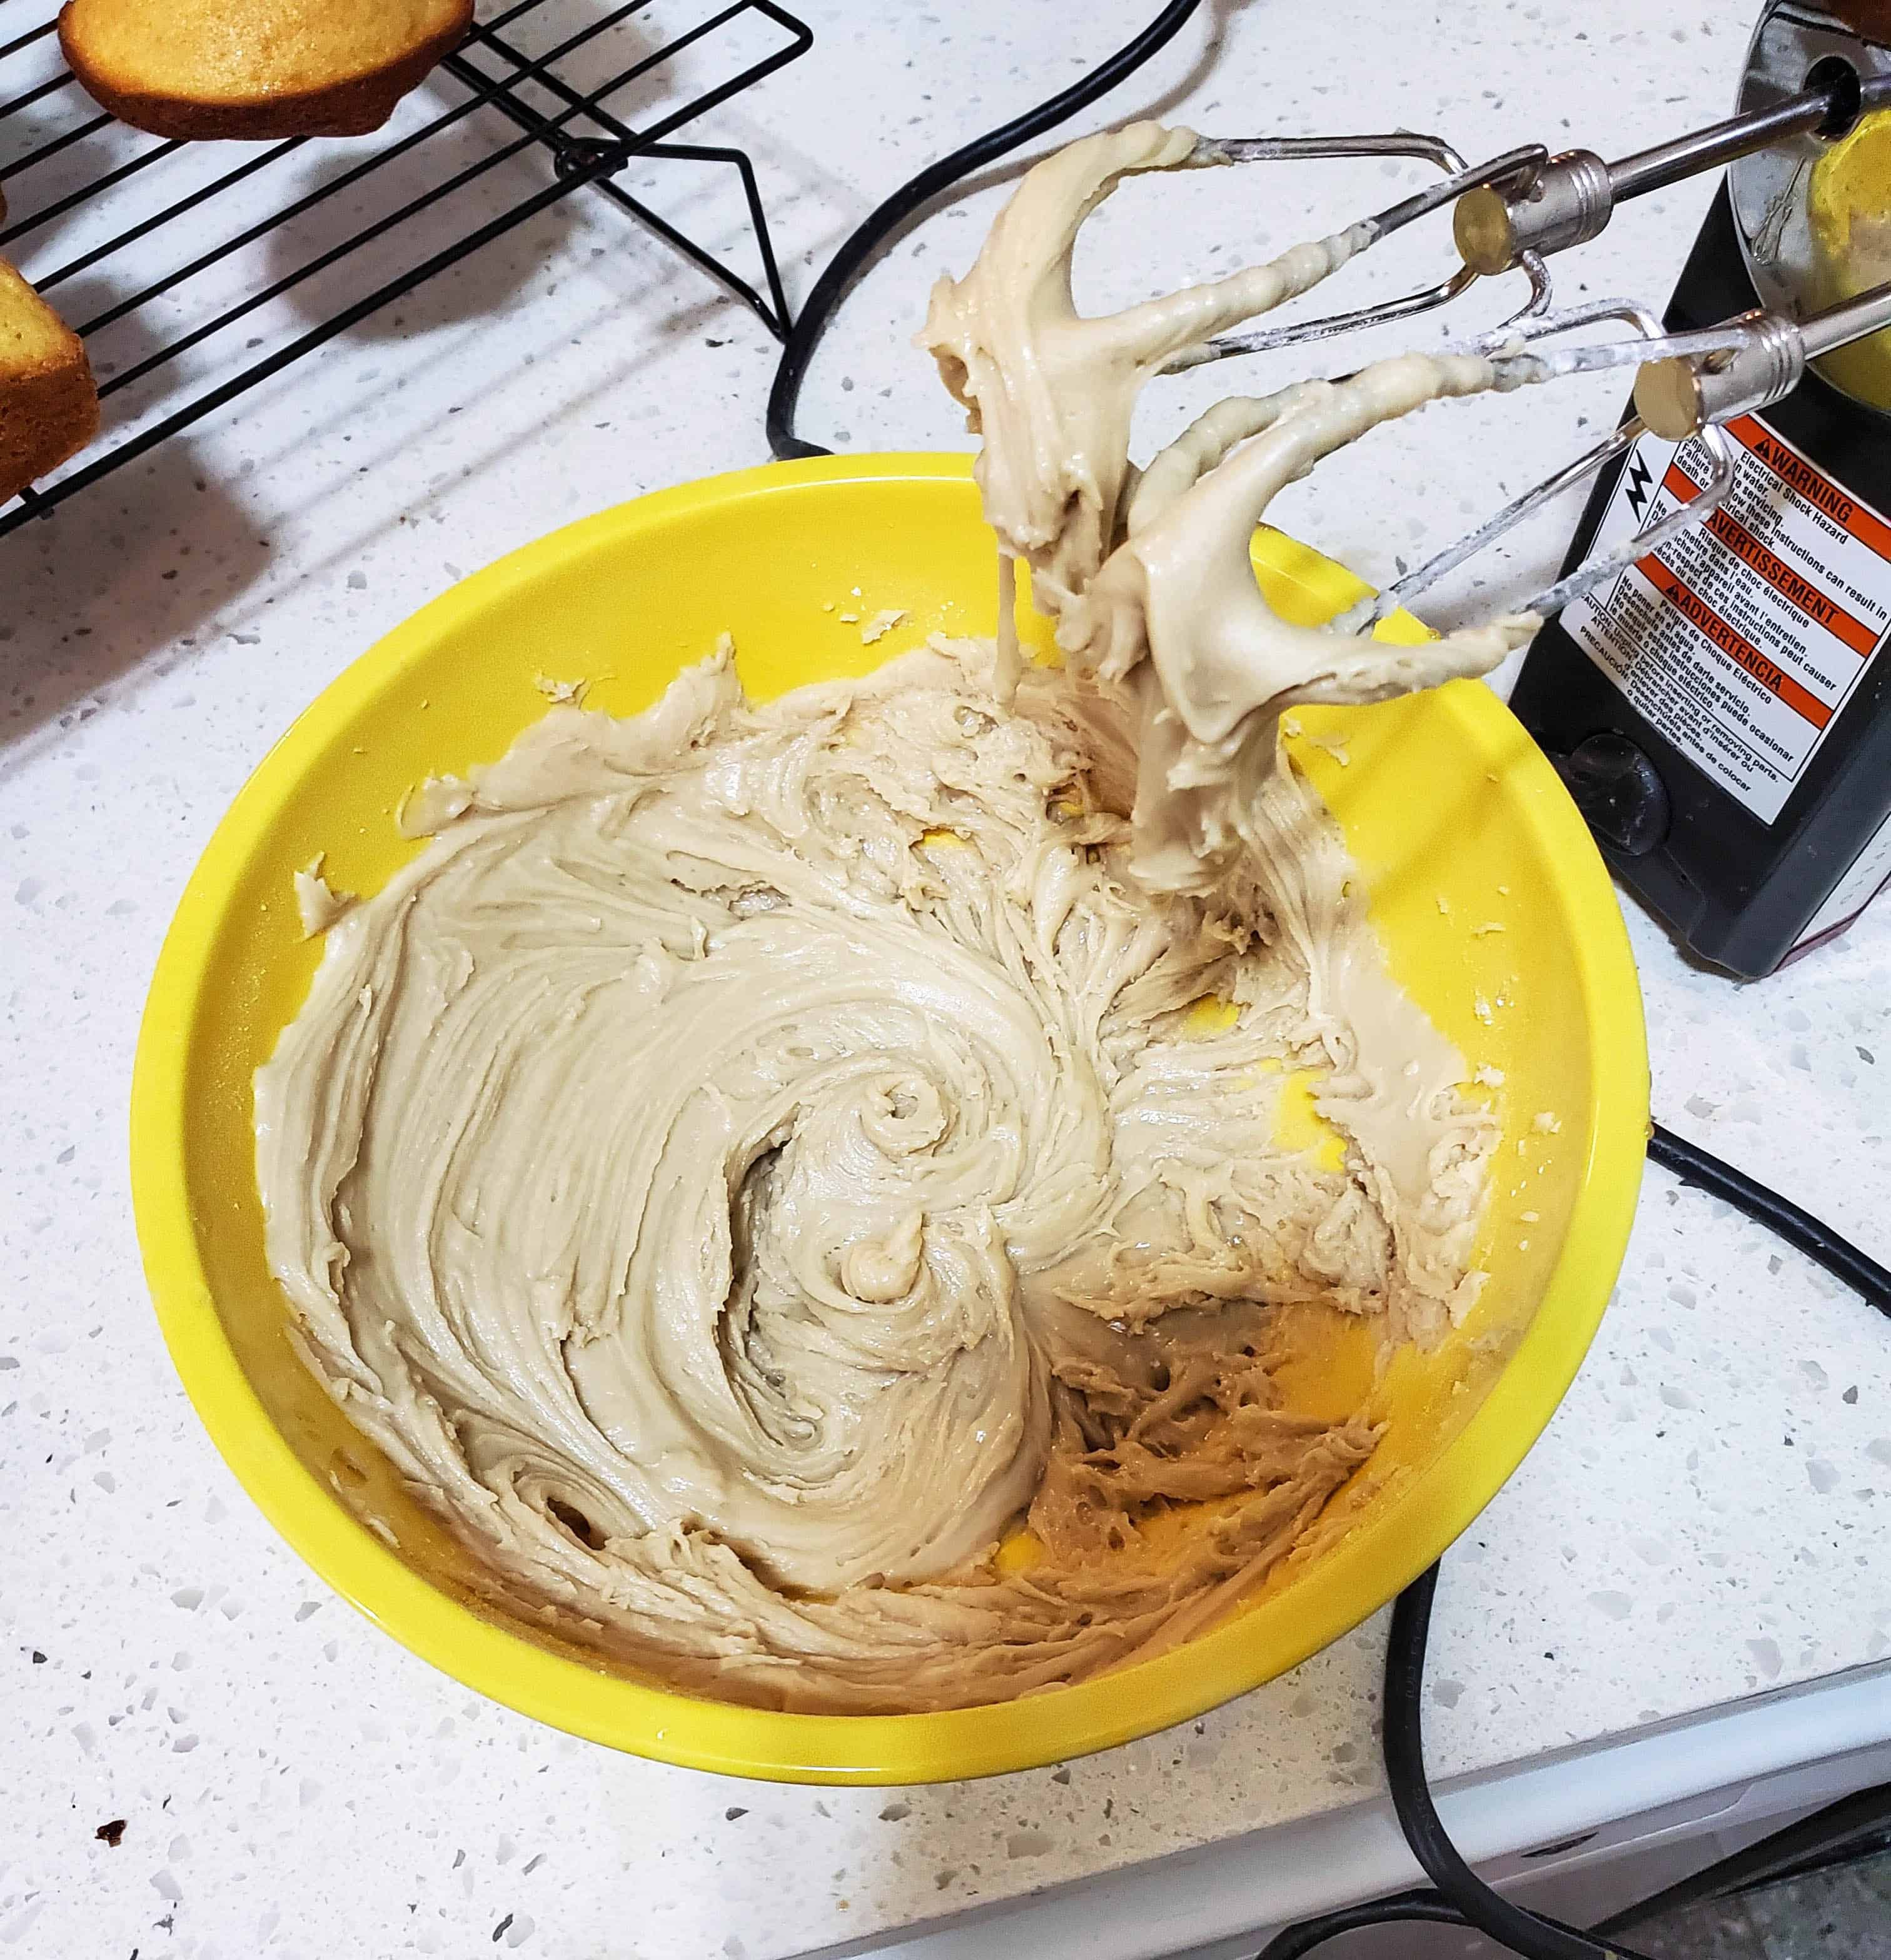
    The Butterscotch Frosting

    I was pretty happy with how the cakes came out, otehr than not exactly being the right shape. I put them on a rack to cool and went on to the more interesting part, making butterscotch. I’d never made butterscotch before, and frankly I didn’t even know what it was (although I knew the flavor obviously). Well it turns out it’s basically just brown sugar and butter.

    Butterscotch
    Butterscotch

    As you can see in the photos from the fact stirring it left clean spots on the pan, it’s pretty viscous. Once the butterscotch was made I let it cool to about room temperature, and then incorporated it in to butt(scotch) cream to frost the cakes.
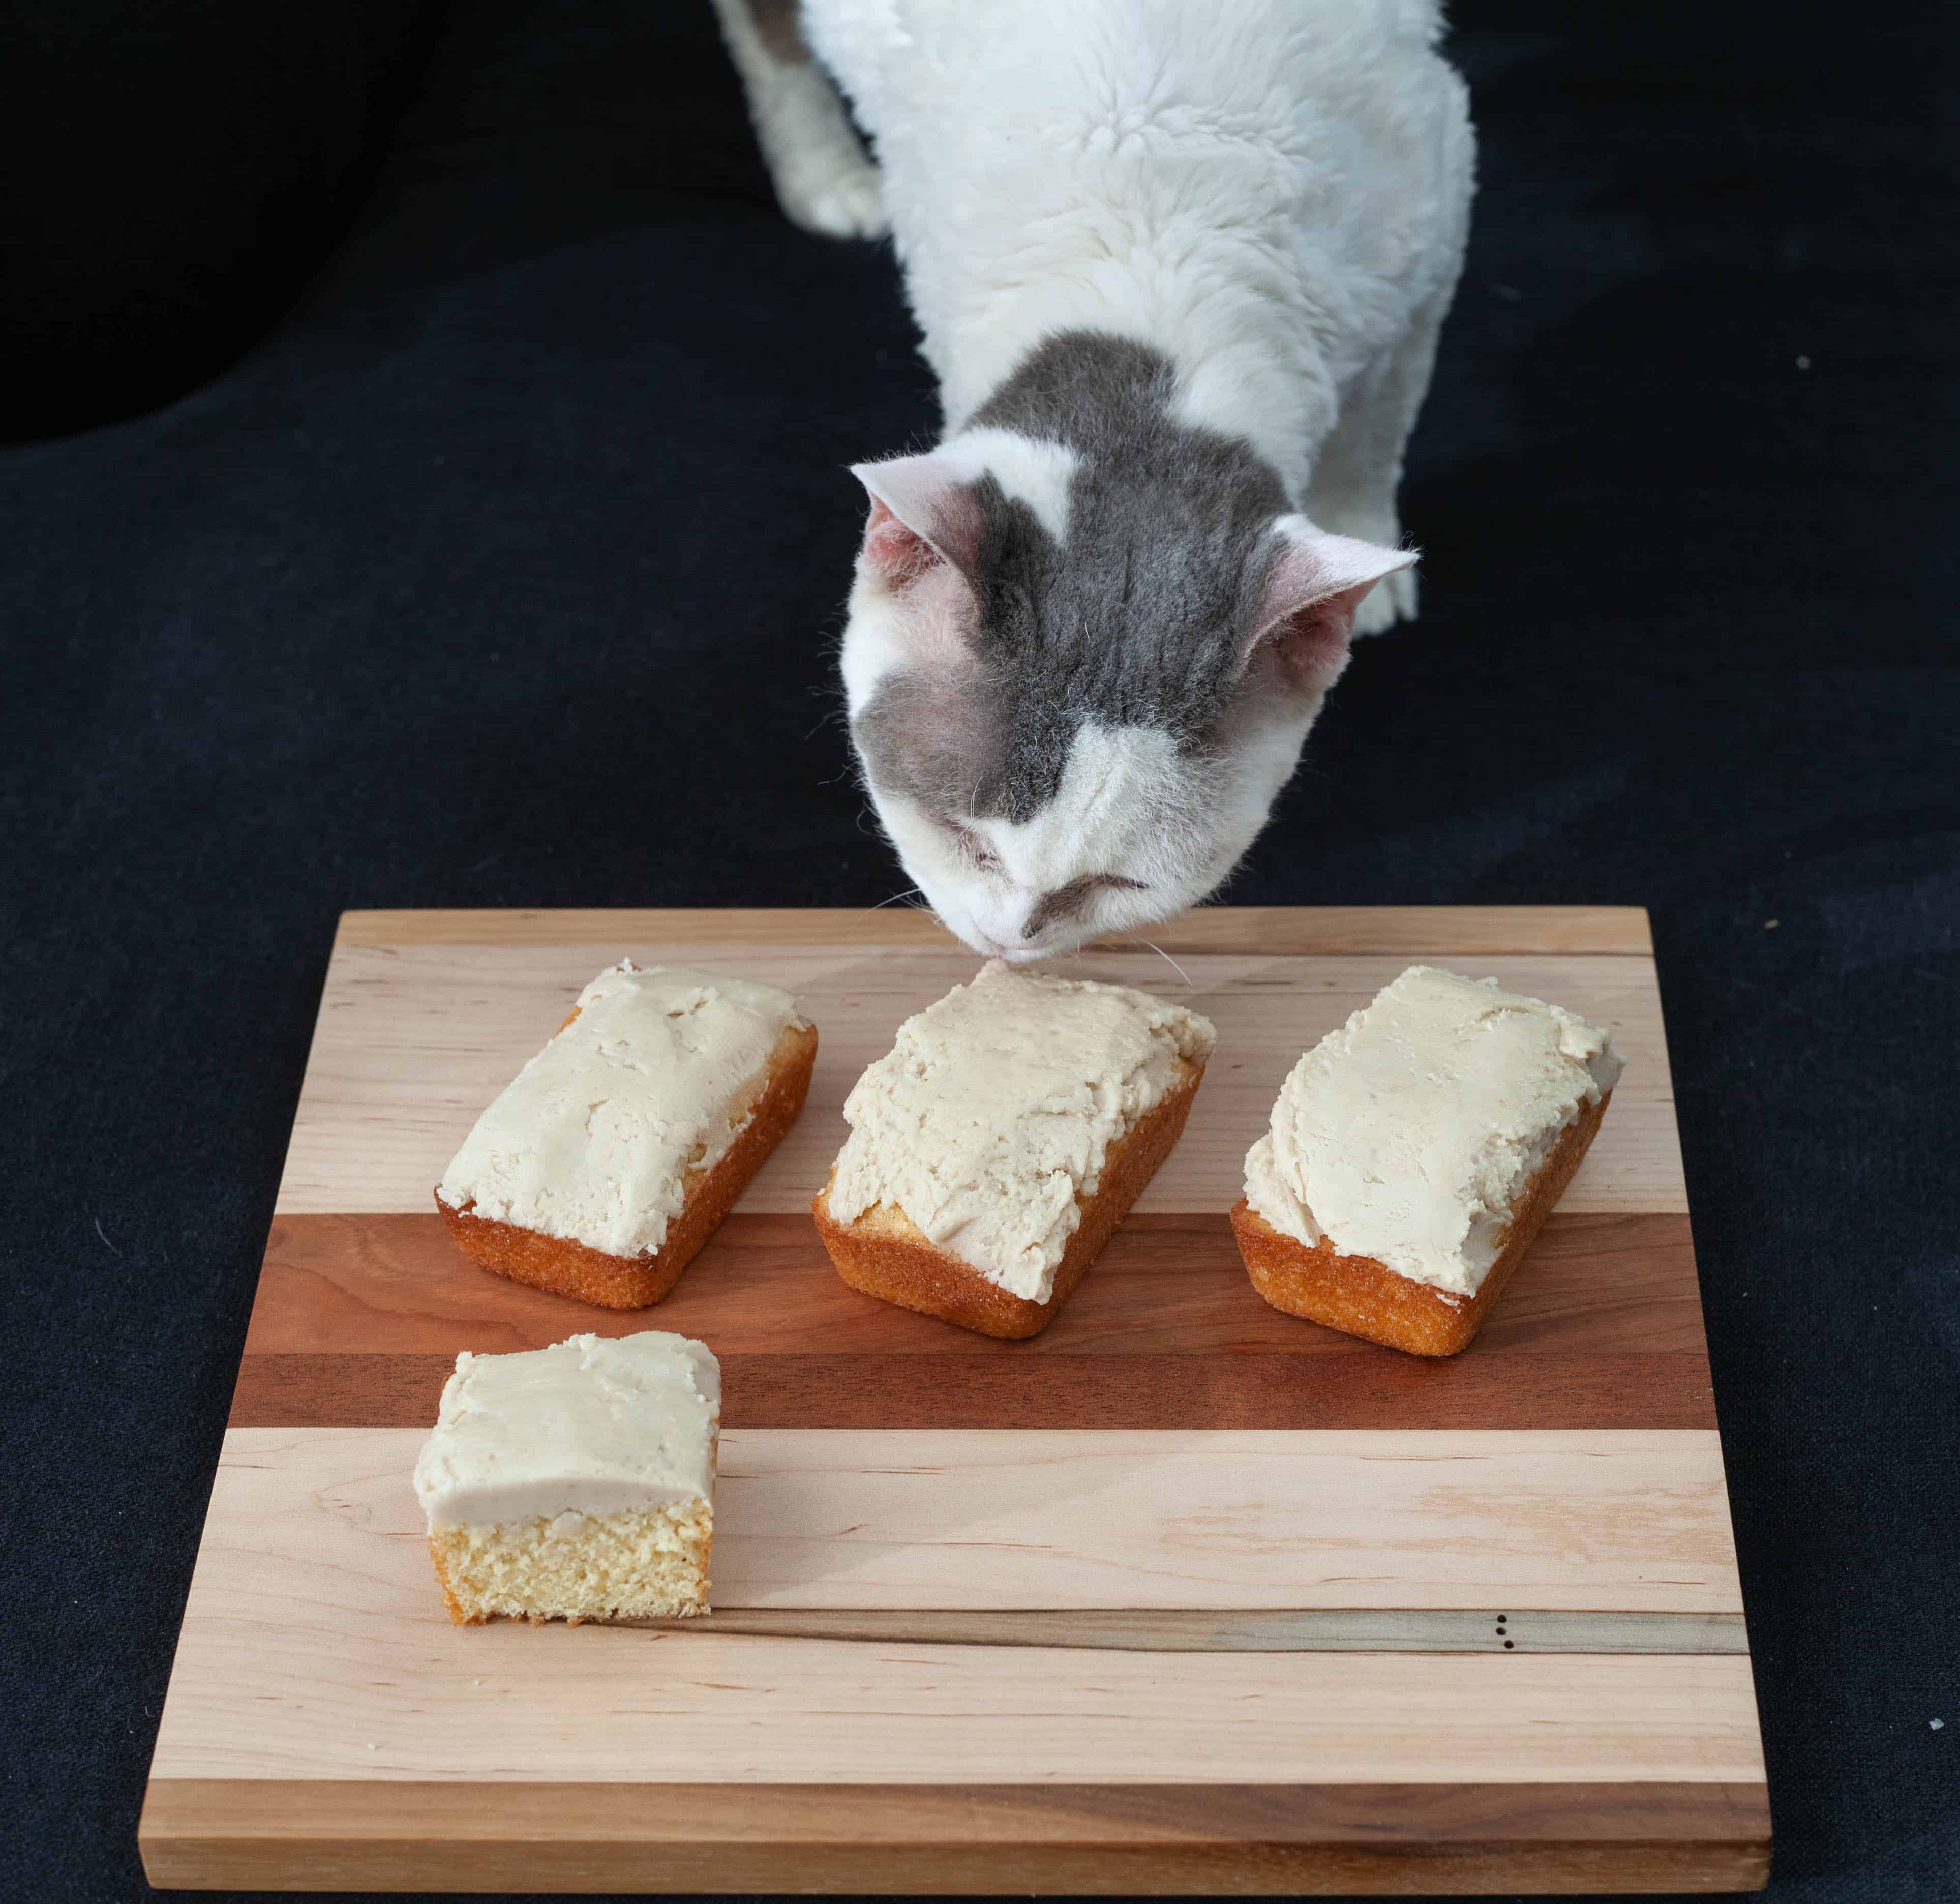
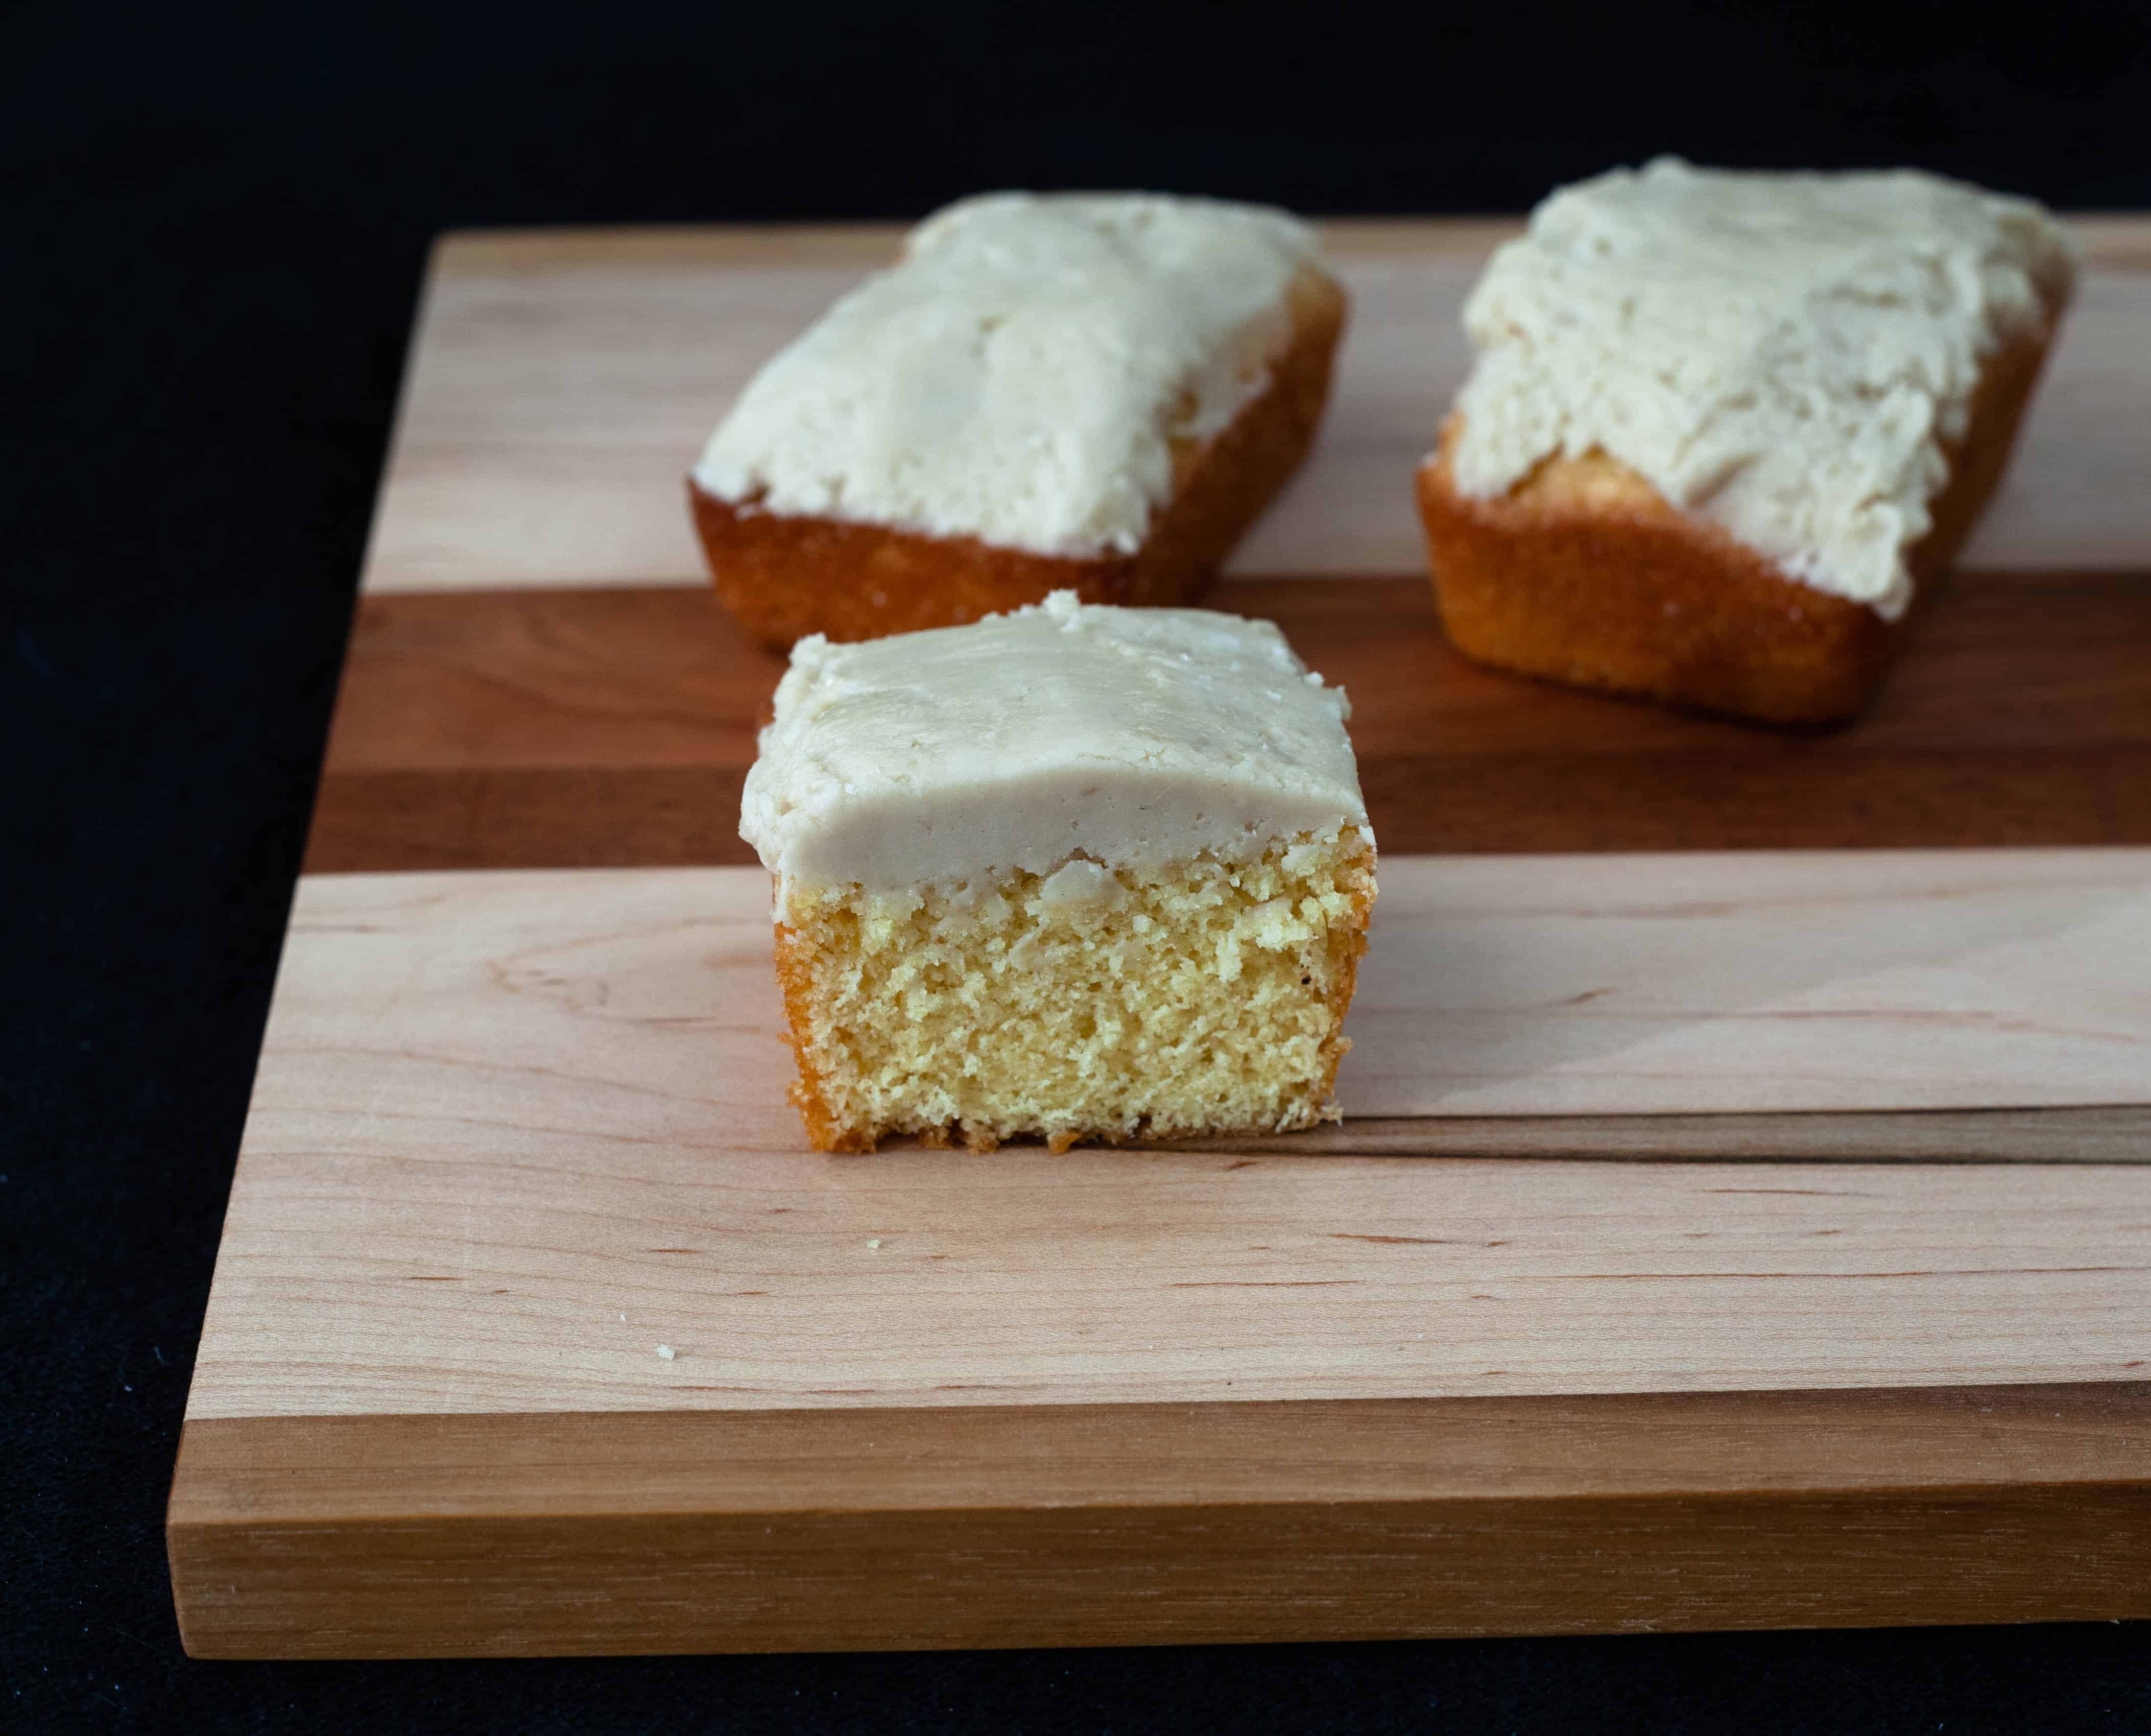
    Butterscotch Frosting
    Butterscotch Frosting

    The Final Product

    The frosting was very thick and if I had it to do over again (which I almost certainly will :)) I’d thin it out a bit to make it easier to spread. One of the trademark things, to me at least, of a krimpet is the super smooth sheet of frosting, which I definitely couldn’t get with this consistency. Still pretty happy with how they came out..

    Homemade Krimpets
    Krimpets

    Despite not being perfect, they really hit the spot, and my wife loved them too. Didn’t have a chance to share them with anybody else because, you know, quarantine, but I’ll definitely make them again. I even plan to get a more appropriately shaped pan for them.

    Enjoy one last bonus photo of one of my cats crashing my krimpet photo shoot.

    Homemade Krimpets. Cat isn't sure about this.
    Chi Chi not sure if food..

  • Apricot Date Scones

    Apricot Date Scones

    My wife had been bugging me to make scones for a while, and we had some dried apricots and dates laying around, so I made some Apricot Date Scones.

    I basically followed the King Arthur Flour scones recipe which is generic scones you can mix whatever you want in to.

    Apricot and Date Scones

    Scones with apricots and dates.

    Dough

    • 2 3/4 cup flour
    • 1/3 cup sugar
    • 3/4 tsp salt
    • 1 tbl baking powder
    • 1/2 cup butter (cold)
    • 2 eggs
    • 2 tsp vanilla
    • 2/3 cup milk
    • 1-2 cups fruit/nuts/whatever (I used apricots and dates)

    Topping

    • 2 tsp milk
    • 2 tbsp sugar (ideally coarse, I used sugar in the raw)
    1. Whisk together the flour, sugar, salt, and baking powder

    2. Dice the butter and work it in until you get a crumbly texture

    3. Dice and stir in the fruit

    4. In a separate mixing bowl, whisk together the eggs, vanilla and milk

    5. Add liquid to dry and mix until it holds together

    6. Split dough in half and make 2 circles about 6" in diameter

    7. Brush the disks of dough with the milk and then sprinkle the sugar on top.

    8. Cut each disk into 6 wedges and separate the wedges a bit to allow for expansion during baking.

    9. Chill the scones for 30 minutes in the freezer and preheat your oven to 425F.

    10. Cook scones on a high rack in the oven for 23 minutes.

    They came out really tasty. Wife was pleased I baked a request, and like they say, happy wife happy life. Especially when you haven’t left the house for 2 weeks and probably wont for another six.

    Single Scone.
Apricot Date Scones
    Single Scone
    Cross Section
Apricot Date Scones
    Cross Section
  • Pecan Pie

    Pecan Pie

    Pecan Pie! The world might be going crazy, but Pi day is Pi day, so of course I had to bake a pie. I’m actually not normally a huge sweet pie fan, but I am a big savory pie fan. Either way, somehow I haven’t posted a pie before. The closest I probably came was the chocolate chip cookie cheesecake that was pretty pie like. Anyway, it was Pi Day, and I had some pecans at home, (which ironically I had bought by accident), so I decided to make a pecan pie.

    I was torn between two recipes. Mary Berry’s recipe from her baking bible, and Sally’s Baking Addiction ‘s recipe. In the end I decided to go with Mary Berry’s because I liked that it used maple syrup instead of corn syrup (which, to be fair, Sally also suggests as an alternative).

    First I mixed up a dough. Mary’s recipe includes a short crust recipe to use, so I made that first..

    Mary Berry’s Rich Shortcrust Pastry

    Mary Berry's shortcrust pastry crust.

    • 175 g Plain Flour
    • 15 g Confectioner's Sugar
    • 75 g Butter (Unsalted, diced)
    • 1 large Egg Yolk
    • 1 tbsp Cold Water (More if needed)
    1. Add sugar and flour to a large bowl and work in the butter until the mix resembles a breadcrumb consistency.

    2. Add the yolk and water and mix until everything comes together as a firm dough.

    3. Wrap in plastic and refrigerate for about 30 minutes.

    Then I made the filling and put it all together…

    Full Pie Shot.
    This is what you want to end up with.

    Mary Berry’s Pecan Pie

    Mary Berry's pecan pie recipe from her 'Baking Bible' book.

    • 1 Pie Crust (from above) ((or premade if lazy I guess))
    • 25 g Softened Butter
    • 175 g Light Brown Sugar
    • 3 large Eggs
    • 200 ml Maply Syrup
    • 1 tsp Vanilla
    • 150 g Pecan halves ((I actually used chopped))
    1. Preheat oven to 355F.

    2. Assuming home made dough, roll out the dough and line a tart pan. I used a nine inch with removable bottom. The removable bottom ended up being a missed blessing which I'll get to later.

    3. Prick dough all around with a fork. Place parchment on top of the dough and fill with baking beads. Blind Bake for 15 minutes. Remove beans and parchment and bake for 5 more.

    4. In a bowl beat the butter and sugar together. Then add eggs, maple syrup, and vanilla and beat some more.

    5. Fill the pie crust with pecans. If you used halves you can try to arrange them arfully, I used chopped pecans so I just poured them in and distrbuted them as an even layer.

    6. Pour in the filling. This is where the pan was an issue. Remember how you prick a bunch of holes in the dough..? I ended up with a huge mess after filling it. Next time I'd either line the pan with parchment, or be careful about not putting holes in the dough by the seam/joint between the ring and the pan bottom.

    7. Finally, bake for 30-35 minutes, until the filling has completely set. I needed the extra 5.

    The results were AMAZING. Easily one my own favorites of things I’ve baked. Of course it doesn’t hurt that I love pecan pie anyway.

    Picture with slice removed.
    Crumb shot? Is that still what you call it for a pie?
    A single slice.
    A perfect slice.
  • Unicorn Cake for my Wife's Birthday

    Unicorn Cake for my Wife's Birthday

    I finally made a unicorn cake! If you spend any time reading baking blogs (which you obviously do), or watching baking shows, you know it’s been a huge trend for a while now. Well, it was time to make a birthday cake for my unicorn loving wife, so, the choice was clear!

    I didn’t tell my wife what I was making, but I asked for flavor preferences. She wanted chocolate cake and raspberry so I decided on layers of chocolate sponge with raspberry between the layers. I also decided on buttercream, not fondant, to cover the cake. I may or may not regret this. Fondant sucks, but I suck with buttercream and there ended up being SO much to cover the cake decently that it was super heavy.

    The cake and the Filling

    For the filling (only) I used the recipe from Life Love and Sugar’s Raspberry Chocolate Layer cake..

    Raspberry Cake Filling

    From https://www.lifeloveandsugar.com

    • 1/4 cup Sugar
    • 1 tbsp Cornstarch
    • 2 tsp Water
    • 2 cups Raspberries (I used frozen ones (that I thawed))
    1. Add everything but the berries to a saucepan and heat until it's all well combined

      Add the raspberries, stir around a bit to get them well coated.

      Once the berries get soft and are creating juice, use a spatula to mash them up well.

      Cook about 5 more minutes to allow the mixture the thicken up a bit.

    For the sponge, I followed the King Arthur Simple and Rich Chocolate Cake recipe with one small change, well, 2 really. 1) I multiplied everything by 1.5 since I wanted 3 layers and this recipe only made 2. 2) I added some real melted chocolate instead of just cocoa powder. It’s something I picked up from Great British Bake-Off where Paul Hollywood always says never use just cocoa powder and no real chocolate. For the chocolate to melt, I don’t buy a candy bar, and I don’t use that gross baker’s stuff. Jacques Torres baking chocolate is my go-to.

    Once I had filling and layers of cake, I needed buttercream. I like the recipes/instructions from Dulcia Bakery because she explains how to vary the consistency. I made a batch of medium and a batch of stiff. The medium was used for the constructions and covering. I laid a bead around the outside edge of each layer to retain the raspberry filling. Then I used it to do a crumb coat, and after about 20 minutes in the fridge, used the rest to do a smooth coat. The thick consistency was used to do the decorations, which I’ll talk about next.

    The Decorations

    Obviously the wow factor on a unicorn cake is the horn first and foremost, along with the ears and eyes/eyelashes. I bought this mold kit on Amazon that has a horn mold, and ear mold, and an eyelash mold. The horn mold ended up being way to small, but I used the ear and eyelash molds to pretty good effect. All I needed to do was soften up some fondant by rolling it in my hands, then put it in the molds and let it set.

    For the horn, I took two pieces of fondant and rolled them out into tapered carrot shapes. Then I took a skewer and just twisted them together around it. I then painted the whole thing gold (of course!) with some gold luster dust. I also painted the inside of the ear with gold. The eyelashes I painted black.

    The final element was the mane. I took my stiff buttercream and split it in half. One half I colored pink, the other purple. To achieve the multi color effect I followed a tip I saw in some tutorial (can’t remember which :/). The tip was, lay out a long strip of cling film, and with a spatula make two side by side lines of buttercream on it with the two colors. Then you twist this up into a tube, and squeeze it out into your piping bag. It worked like a charm. I’ve tried the more traditional, load the bag with two colors side by side approach before, and it never worked as well.

    Finishing Touches

    The very final touch was some artisanal sprinkles (who knew?!) that I got from Delta Sprinkles on etsy. It all came together beautifully. If I had it to do over I’d probably make two changes. First, I used 9″ rounds because that’s what I had on hand. It was too big, I would use 8″ or maybe even 6″ or 7″ next time. Second, I was too heavy handed on the buttercream, making the cake super sweet. I attribute t his mostly to me being bad at getting a nice smooth finish and needing to keep slathering on more buttercream to fix mistakes.

    All in all, it ended up delicious and beautiful anyway, and my wife was thrilled and very surprised when I revealed it.

  • Birthday Chocolate Chip Cookie Crust Cheesecake

    Birthday Chocolate Chip Cookie Crust Cheesecake

    December 24th is my Brother In Law’s birthday. There’s a long standing family tradition of him getting a giant chocolate chip cookie cake for his birthday. This year he requested something different, a cheesecake, but he still wanted chocolate chop cookie incorporated somehow if possible.

    This lead me to some googling which turned up lots of chocolate chip cheesecake recipes, but I didn’t feel like just tossing some chocolate chips, or some pieces of cookies, in to a cheesecake was really what I was looking for. Then I came upon this recipe for a cheesecake with a cookie crust. This seemed like exactly what I wanted, with the exception of being chocolate cheesecake. Knowing the palates of the folks I was cooking for I thought that would be too much.

    To solve the cheesecake problem I consulted one of my go to blogs, Sally’s Baking Addiction, and saw she has a no bake cheesecake recipe, so I used that.

    The Money Shot!

    So I made the crust, let it cool down in the fridge completely, made the filling, put it in the crust, covered it.. and we all went out for dinner and drinks while I hoped the cake would set. When we got back we gave the birthday boy presents and it was cake time. I popped the springform mold open and hoped I’d have a solid cake. I did! Some chocolate drop and homemade marshmallows completed the decoration and cake was served. Everyone loved it. Personally I think I prefer baked cheesecake to no bake, but I’m not sure how I could pull that off with the cookie crust. I guess I have a whole year to try and research it.