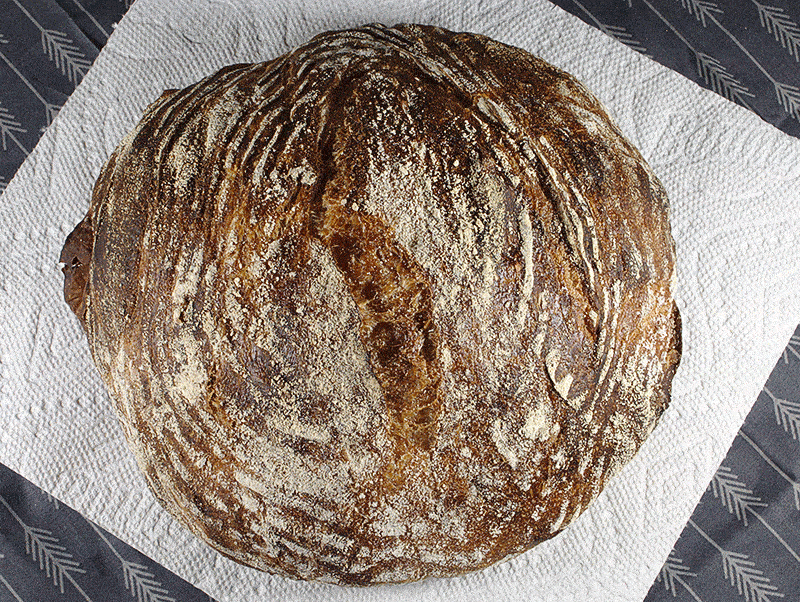
I started baking bread after being inspired by Paul Hollywood. Paul is a very old school, knead it by hand until your hands are aching kind of guy. It can be, frankly, a pain in the butt. As I read more about baking on reddit and other websites, I started seeing people talking reverently about ‘FWSY’ and no-knead bread. The ubiquitous ‘FWSY’ turns out to be shorthand for ‘Flour, Water, Salt, Yeast’, a book by Ken Forkish, owner of Ken’s Artisan Bakery in Portland, which has become sort of the new testament of bread baking for a lot of people.
Ken’s technique centers around a few concepts that differ from a lot of traditional methods. First, it uses a very small amount of yeast. Instead of spending a long time kneading the dough you only fold it just enough to mix the ingredients fully. The proofing times are very long, these are not breads you make in one day. Lastly, the loaves are cooked at high temperature, and in a dutch oven that is fully preheated.
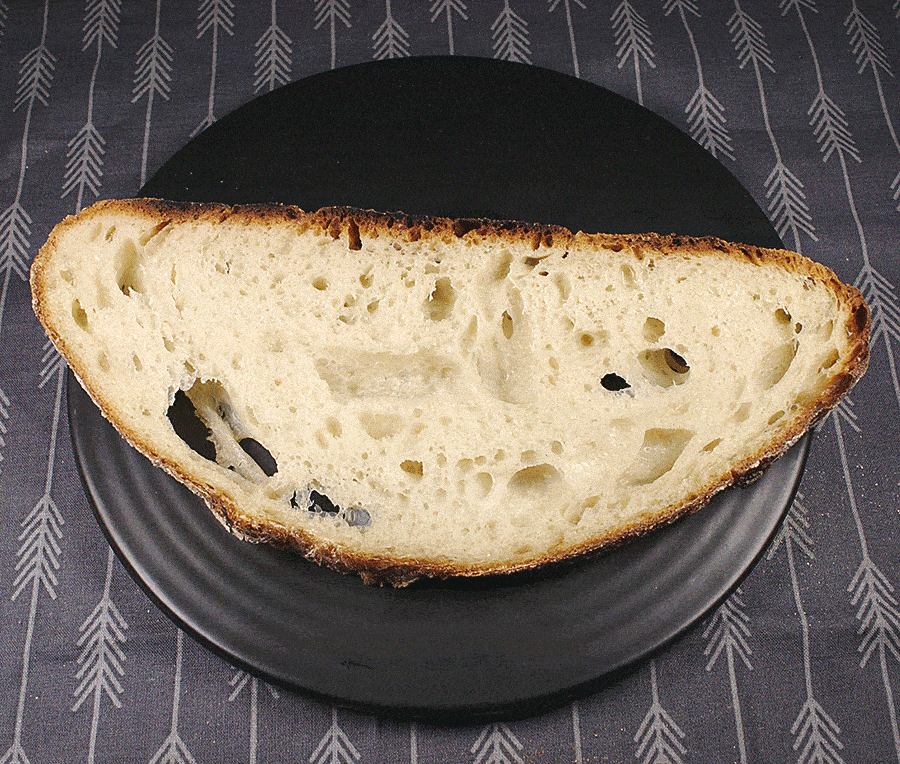
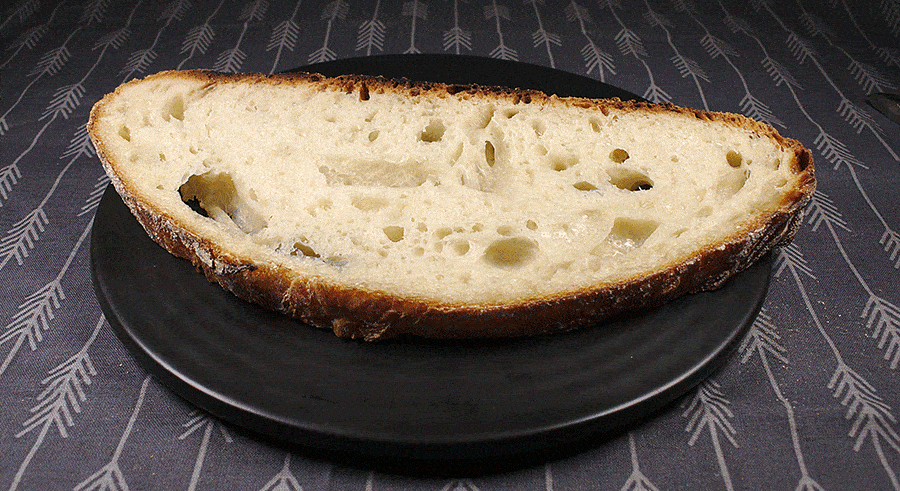
Well.. It works. It’s time consuming, but really amazingly simple and easy. The results are always great, even when I manage to screw it up somehow, the worse that happens is I get a really ugly but tasty and crusty loaf.
Overnight White
From FWSY.
1000 g Bread Flour
780 g Water (Lukewarm (90-95F))
22 g Fine Sea Salt
1/4 tsp Yeast
Combine the flour and the water in a big tub and mix to incorporate. Let it sit for about 30 minutes.
Sprinkle the salt and the yeast over the top (but don’t let the yeast and the salt touch directly). Mix it all together with some folds initially, then with the pincer method.
Let it rest for about an hour, then fold two or three more times. Cover and let proof overnight 11-13 hours more (12-14 total). Dough should be at least 2x and up to 3x as large.
Tip the dough out onto a floured surface. Cut it into two equal parts. Form each part into a nice ball.
Dust and/or oil two proofing baskets or bowls. Place one dough ball in each basket.
Cover the bowls with a towel and proof the loaves for another hour and fifteen minutes.
45 minutes before the loaves are done proofing, preheat an oven to 475 degrees, with 2 dutch ovens inside (if you only have 1 it’s ok, see note later..).
When proofing is done, carefully remove the hot dutch ovens, place a loaf in each, cover, and put them back in the oven. Let cook for 35 minutes covered.
After 35 minutes, remove the tops and cook uncovered for another 15 minutes. Very, very, very, carefully tip the loaves out of the dutch ovens and let cool for at least 20 minutes.
NOTE: If you only have 1 dutch oven, put the second loaf in the fridge while the first cooks. When the first loaf is done, let the dutch oven reheat for 5 minutes in the oven, and cook the second loaf, as above.
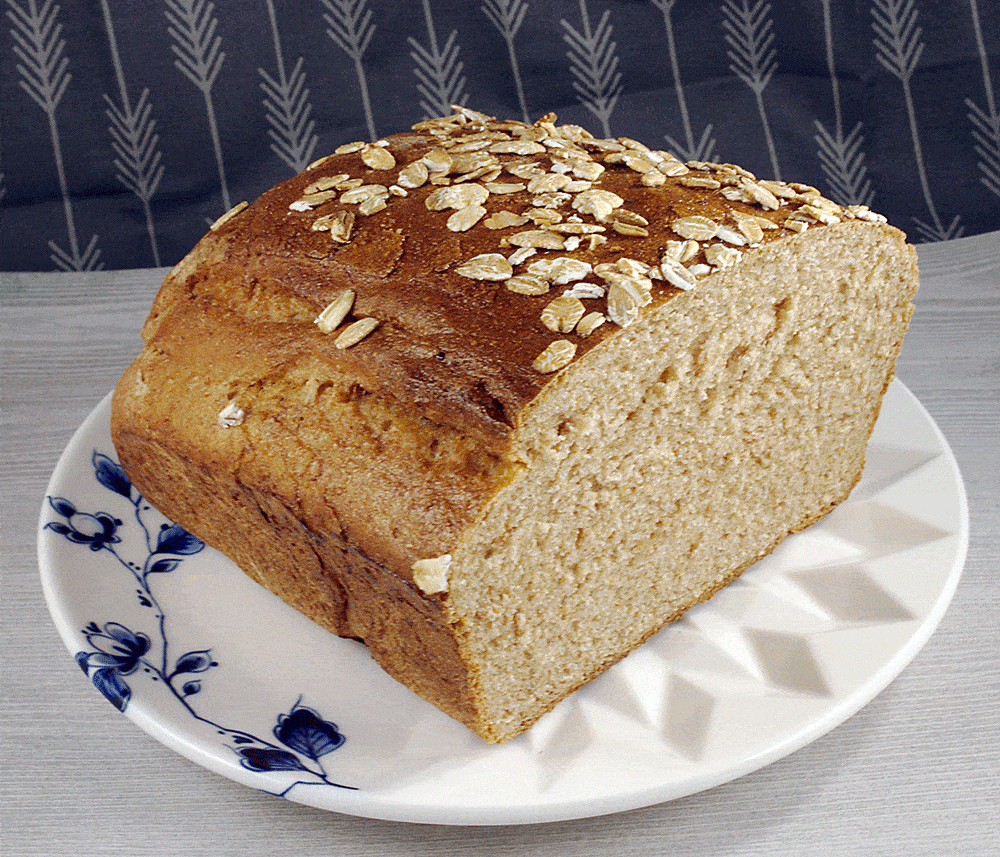
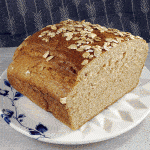
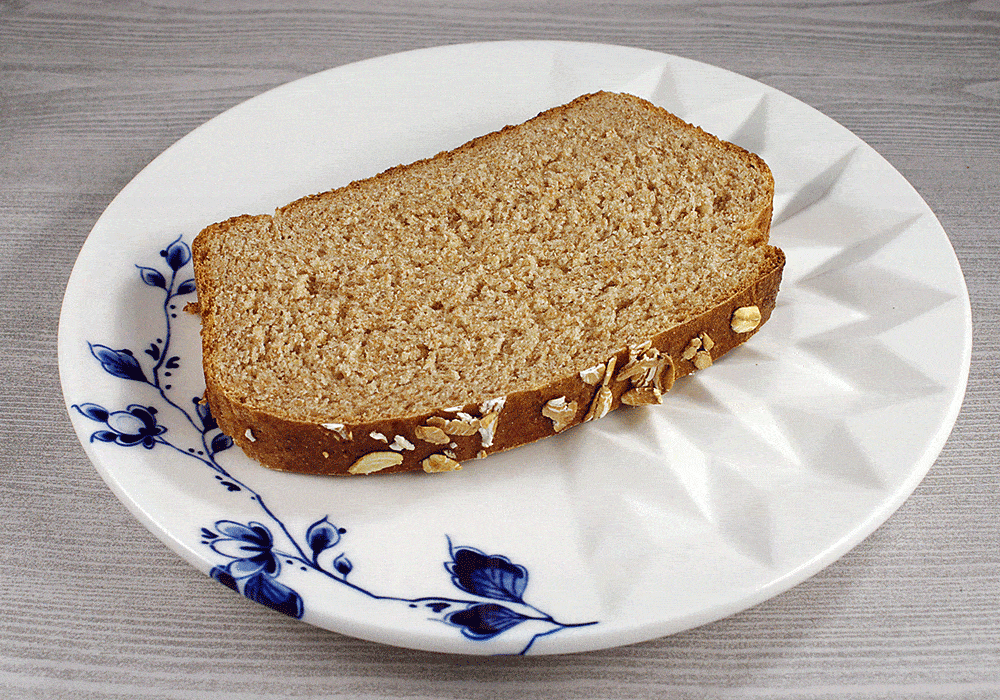
I’ve made spelt bread before, but it was always a percent of spelt flour mixed with white or wheat. This is my first time baking an all spelt loaf. I am very pleased with results. It’s healthier than a regular white sandwich bread, with a nice flavor that is subtlety different.
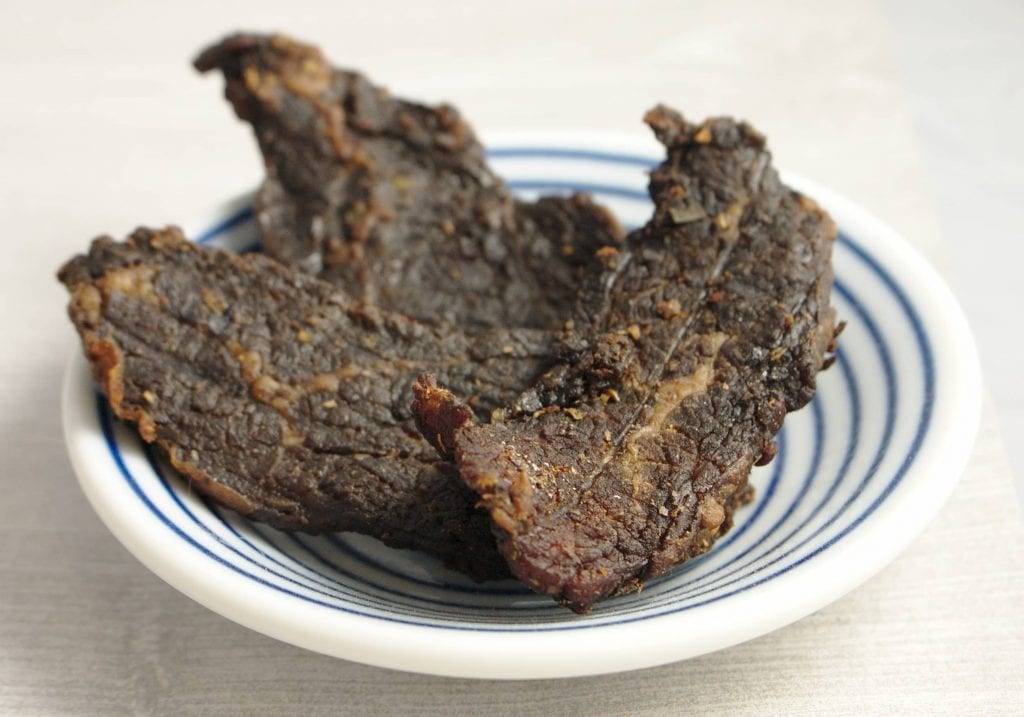
The Delft Blue plate in the photos is a souvenir from a recent trip to Curacao. The trip was amazing, but that’s a post for a different blog.
This recipe makes three loaves, which is a lot. You can use simple math to make two or just one instead. I wanted to experiment with different toppings, so I made a bunch of loaves.
All Spelt Bread
100% spelt flour loaf.
Yeast Mix
2 tbsp Yeast
3/4 cup Warm Water
1/4 cup Honey
Dough
2 2/3 cup Warm Water
1 tbsp Salt
9 cup Spelt Flour
9 tbsp Olive Oil
Optional
1 tbsp Cold Water ((for egg wash))
some seeds/oats/anything to top the loaf
Yeast Mix
Mix 3/4 cup warm water, 1/4 cup honey and 2 tbsp of yeast in a bowl and let sit for a few minutes.
Dough
Add the yeast mix and half the flour into a large bowl (or stand mixer). Stir well.
When the yeast mix and half the flour are well mixed, add the rest of the flour. I combined everything with the stand mixer for a few minutes then took the dough out and kneaded by hand for about 5 more minutes.
Proofing
Preheat oven to 200F. Once it is up to temperature turn it off. Place the dough in an oiled ovensafe dough and let proof in the warm oven for about an hour. (Should double or more)
Punch the dough down and split in three equal parts.
Fold each piece into a loaf shape and place in a greased loaf pan.
Let the dough proof again, covered and not in the oven this time, for another hour or so. Dough should fill or overfill the loaf pans when done proofing.
Baking
Preheat oven to 425F.
Optional – Egg wash and sprinkle outs or some other grain on top of loafs if desired.
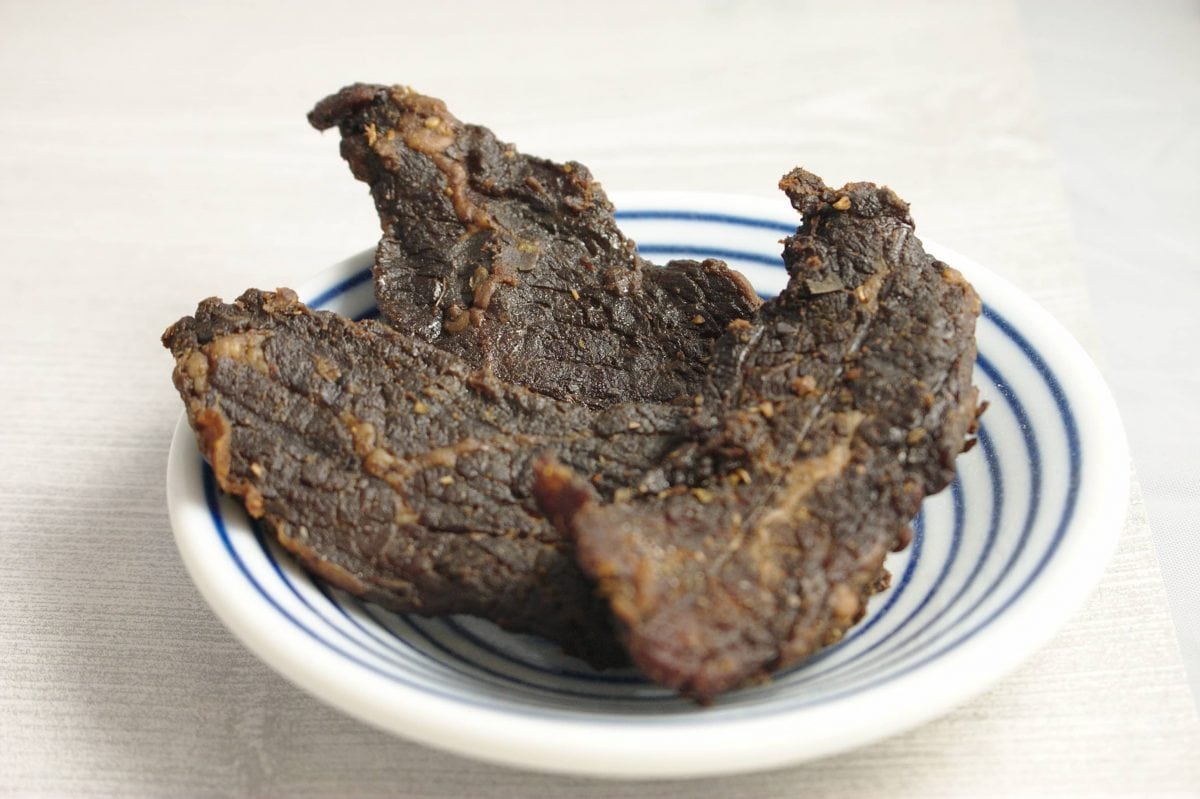
My wife and I were looking for a healthier snack to keep in the house. We both like beef jerky, but it’s super expensive, and I never seem to think to buy it unless I’m stopped at a gas station on a road trip or something. So I decided to try making a batch.
Now I now what you are thinking.. Beef jerky? That’s not exactly bread. Isn’t this a baking blog? Well, I don’t own a food dehydrator, so I did bake it.. at a chilly 175F.. for over six hours. But hey, technically baking!
How do you make jerky?
Good question! I didn’t really know either, beyond obviously drying out meat. I’m a fan of the youtube series “It’s Alive With Brad” and he has a beef jerky episode, so I watched that for some inspiration. I didn’t follow his recipe though, for one thing, he uses a dehydrator and I needed to know how to bake it. (see above)
I settled on a recipe I found on the Pioneer Woman website. With two small changes. First, I realized I was out of onion powder, but I did have this bottle of finely diced dried shallots, so I figured, hey that’s pretty oniony. Also, she calls for cooking for 3-4 hours, but I was really unhappy with the texture at that point. I cooked it for another two hours and it made world of difference. This is probably due more to me not cutting the meat thinly and uniformly enough than to the recipe giving bad advice. All in all it came out pretty good in the end.
Mmm.. jerky.
If I did it over I’d definitely marinade longer, I only left it for about an hour. The marinade seems so dark and strong that I was afraid the jerky would end up super salty if I left it longer, but actually I feel like it could have used a bit of a stronger flavor, even though it was really nice. I’d also cut the beef more carefully and really try to have thinner, or at least more uniform, slices.
Recipe
Beef Jerky
Home made beef jerky.
3 lbs Suitable cut of beef ( ( round is considered best by many))
1 cup Soy Sauce
1/2 cup Worcestershire Sauce
2 tsp Liquid Smoke
1 tbl Oregano
2 tsp Ground Black Pepper
2 tsp Paprika
1 tsp Garlic Powder
1 tsp Onion Powder
First, put the meat in the freezer for about a half hour. This makes it much easier to slice.
Slice thinly and as uniformly as you can. You are shooting for 1/8th inch thick.
Combine all the other ingredients in a bowl and mix.
Place the meet slices in a large ziplog bag.
Pour in the mixed marinade and let soak for anywhere from 45 minutes to 24 hours.
When you are ready to cook, preheat an oven to 175F (I had no idea my oven would even go that low).
Line 2 baking shits with tin foil and place wire racks on top. Lay out the meat in a single layer avoiding overlapping or touching slices together.
Cook for at least 3 hours and up to 6 until you have the texture you want.
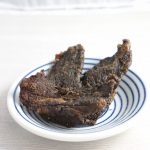
Last week was my wife’s birthday, so a special cake was called for. We had been to Argentina a few months back, and had a jar of genuine dulce de leche we had yet to use, so she requested that figure in, and she wanted it light (oops) and a bit fruity.
After a bit of research, I settled on a recipe I found HERE. Sort of. In making a test batch I realized the recipe was incomplete. In one step it said ‘add the sugar’, but there wasn’t any sugar listed in ingredients. There had been ‘glucose’ (for which I substituted light corn syrup) so I assumed it was that. But then I got to a later step, and you guessed it, needed the glucose. So clearly something was wrong. I referred to the Bouchon Bakery cookbook that the recipe was inspired from, and found the Madeleine Cake recipe that was clearly the inspiration. It called for 180g of sugar, so I used that much..
But then, the cake I made ended up not rising at all, I had like a 1/4 inch cake. Even at 6 layers, that was clearly not correct. So I ended up tossing out the blog’s cake recipe and using the the straight Bouchon Bakery recipe, simply substituting satsuma juice for the lemon juice in the book’s recipe. The book recipe called for less juice, more flour, and it rose and fluffed up just as I’d hoped..
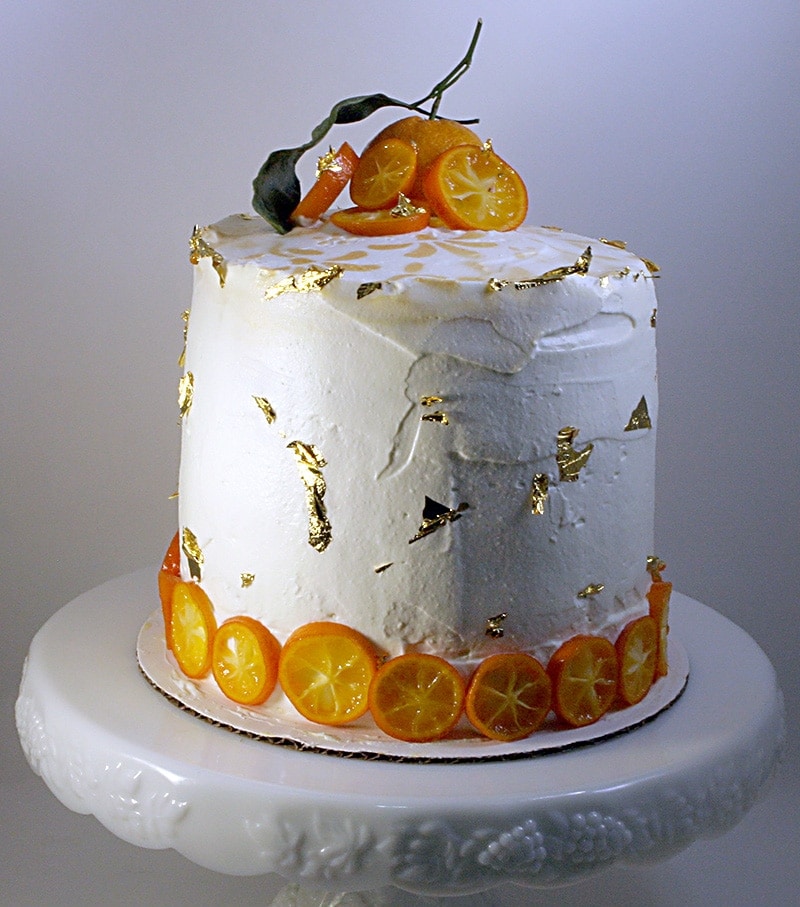
I made Six Rounds Cut From the Sheet Cake
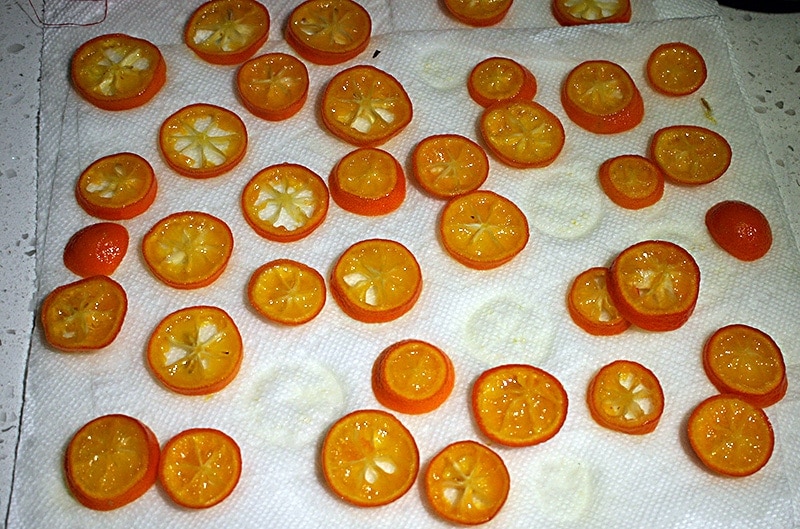
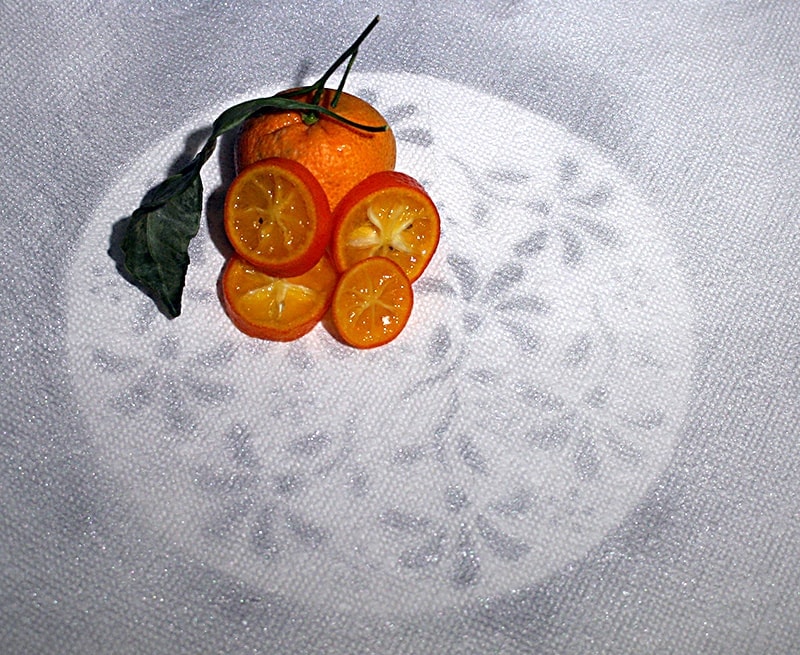
A few days prior, I made some candied kumquats to be used as decoration on the cake. Basically, sliced up some kumquats and put them in a mason jar filled with simple syrup. While the cake rounds cooled in the fridge I spread out the slices on some paper towels to dry a bit.
Candied Kumquat Slices
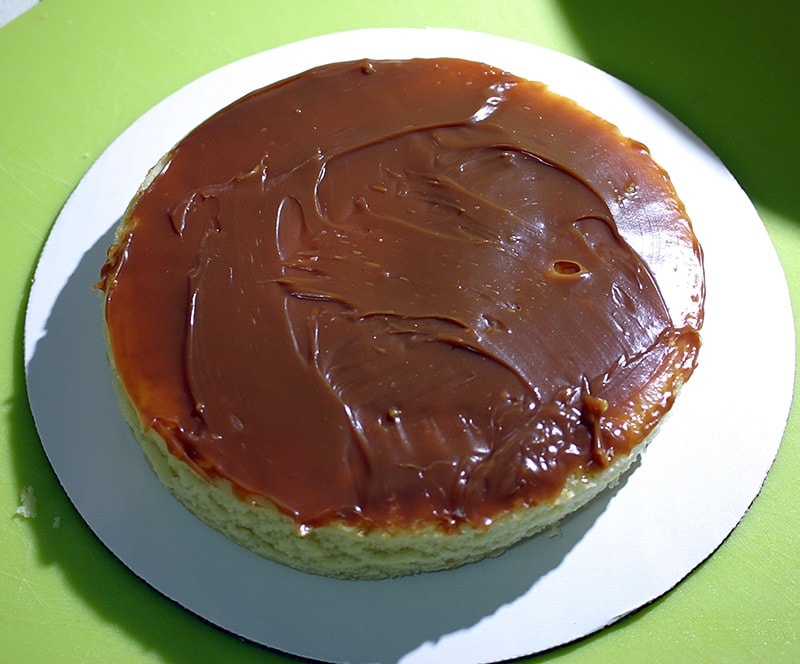
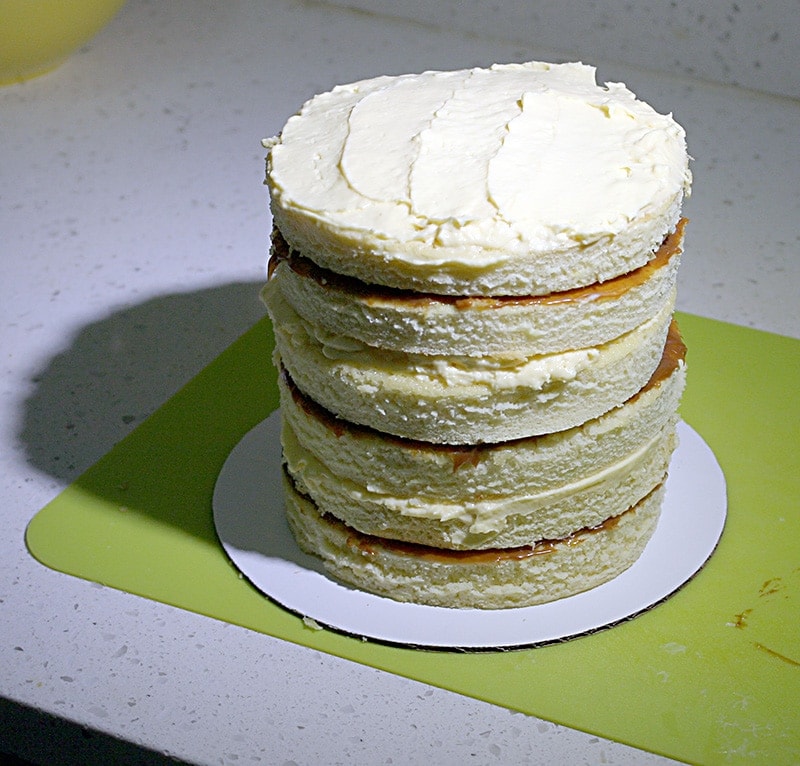
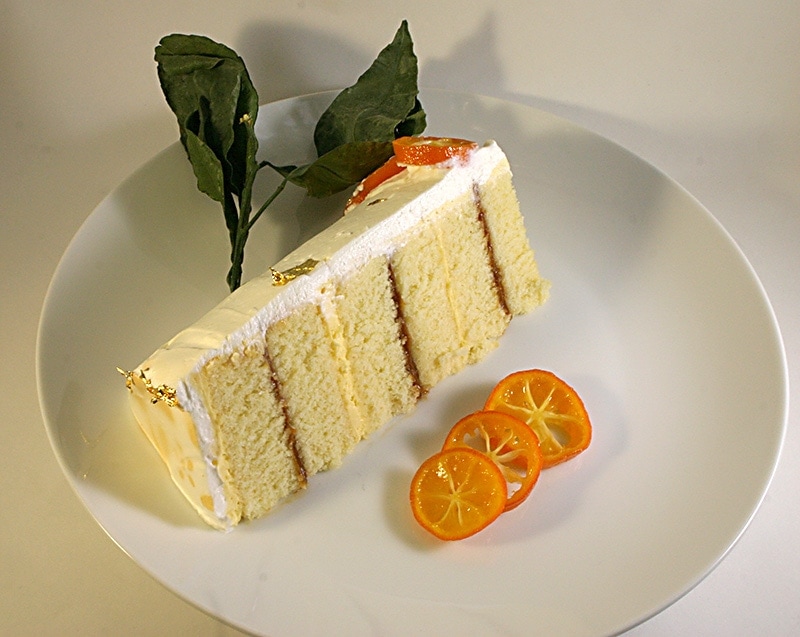
I frosted layers of the cake with alternating dulce de leche and satsuma curd, until I had a cake 6 layers high.
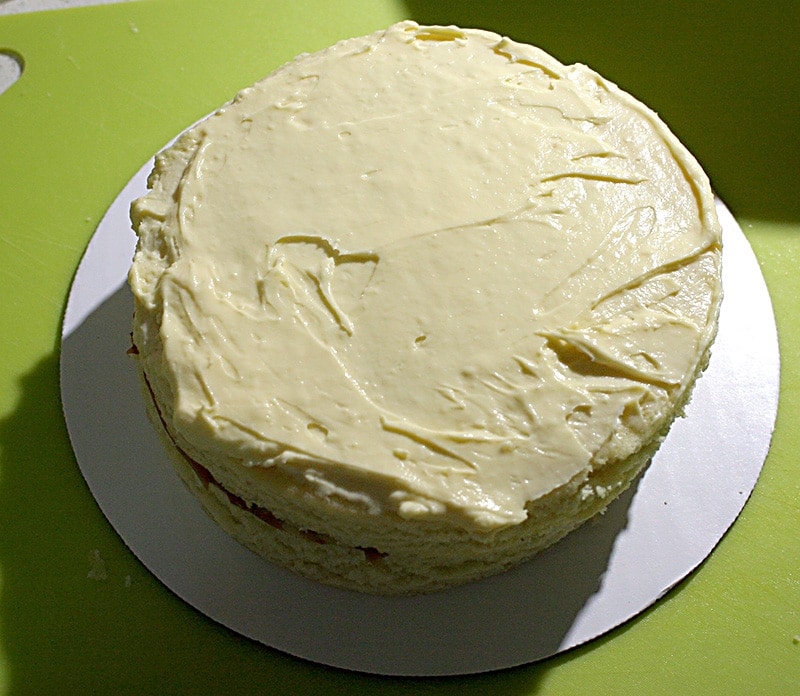
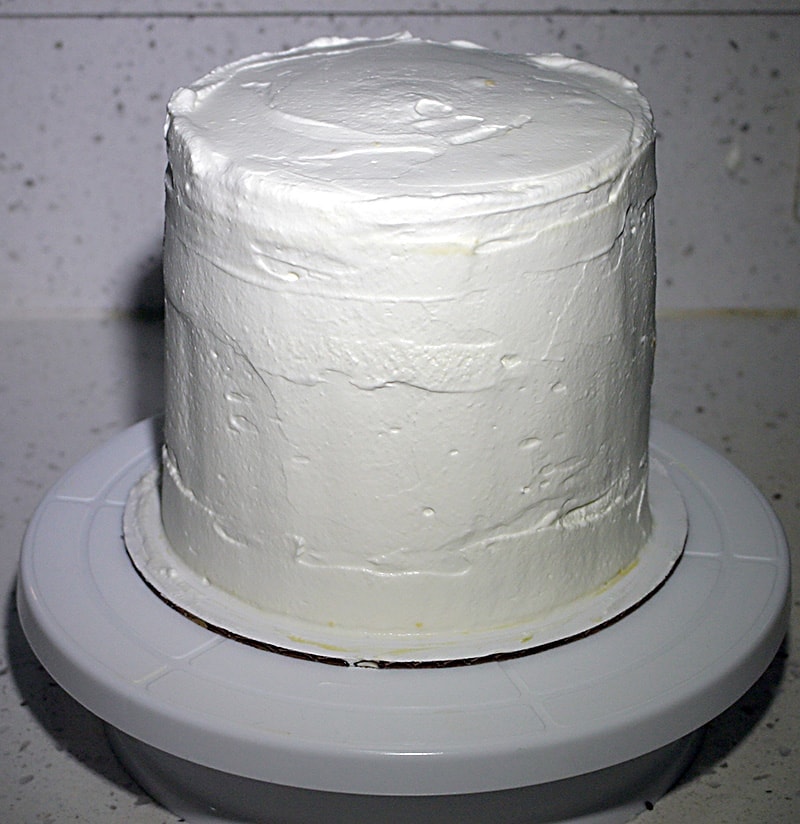
The I used the remaining curd for a crumb coat around the whole cake. After letting that cool for a bit in the fridge I covered the whole cake in home made whipped cream. The original recipe called for butter cream but my wife wanted a lighter and less sweet cake.
While the covered cake cooled in the fridge I did some test mockups of decorations using paper towels for stand in cake tops.
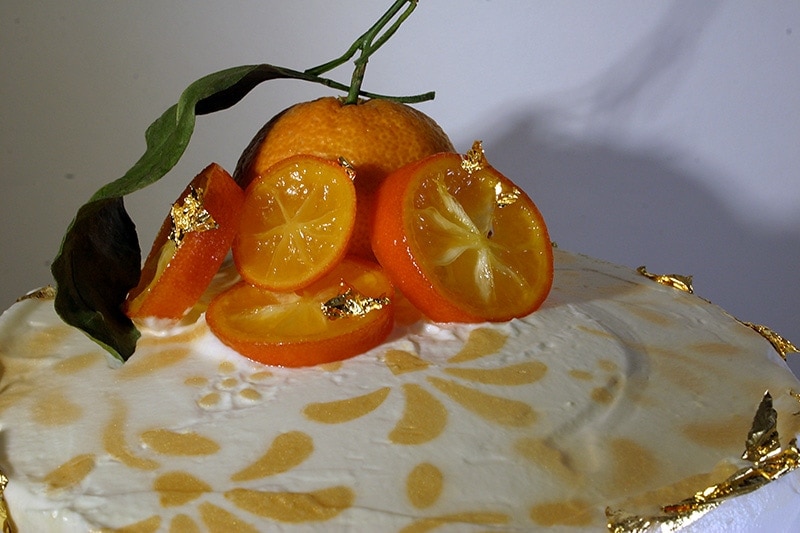
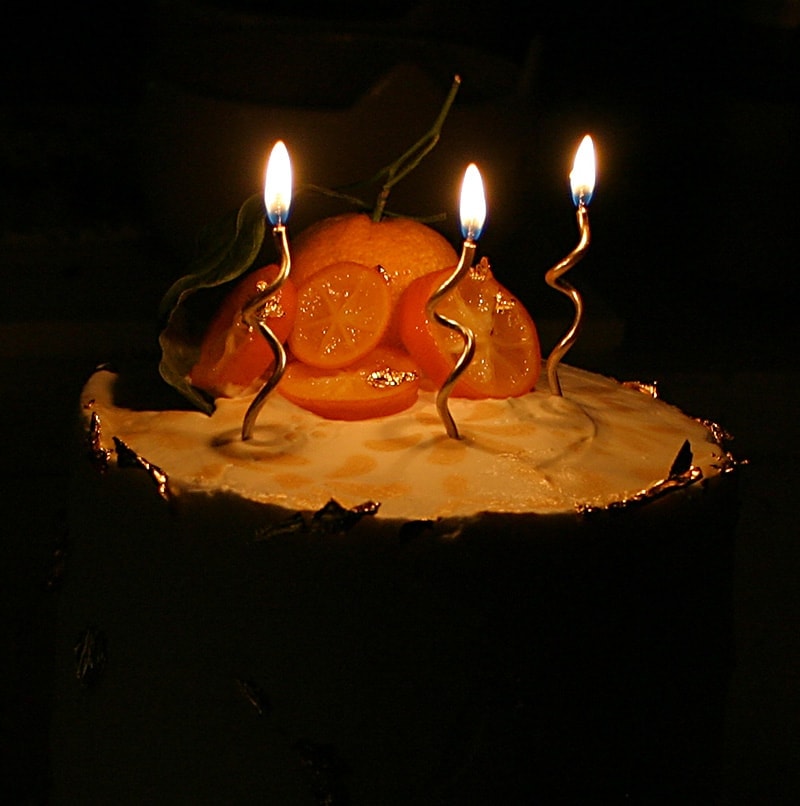
Then I decorated. I used a stencil and edible glitter spray to paint a pattern on the top. Placed a whole satsuma surrounded by some candied kumquat slices, and used some leaves from the fruit to accent it. Lastly a bunch of edible gold leaf (that I had never used before and was a pain to work with) spread around.
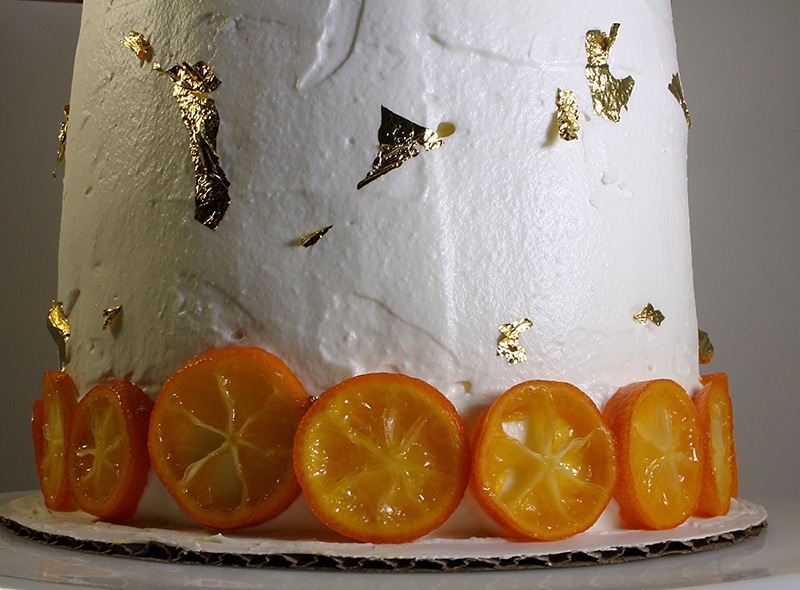
The rest of the cake was kept pretty simple, a ring of kumquat slices around the bottom, and some edible gold leaf placed haphazardly here and there.
Lastly, since it was a birthday cake, we needed some candles for the singing of Happy Birthday.
Finally, after about 3 days work, it was ready to slice and serve. Voila!
It was a huge hit. If I were to make it again I’d be less afraid of the dulce to delche. I didn’t want to use too much and overpower everything, but actually more would have been nice. Other than that I was quite happy with the results, and so was my wife.
Satsuma Curd Dulce de Leche Cake
Cake
188 g All-purpose Flour
1 1/2 tsp Baking Powder
4 Eggs
180 g Granulated Sugar
112 g Glucose ((I used light corn syrup))
75 g Unsalted Butter
38 g Whole Milk
75 g Satsuma Juice ((or regular mandarins if you cant get satsuma))
Candied Kumquats
2 parts Sliced Kumquats ((deseed))
3 parts Sugar
3 parts Water
Satsuma Curd
150 g Eggs
75 g Granulated Sugar
125 g Fresh Satsuma Juice
25 g Fresh Lemon Juice
195 g Unsalted Butter
2 g Gelatin Sheets
Whipped Cream
2 cups Whipping Cream
1 cup Confectioner's Sugar
Candied Kumquats
This was the simplest part of the recipe. Just slice up the kumquats and remove the seeds.
Mix the water and the sugar and heat until combined fully. Put the kumquats in a mason jar or similar, and pour in the syrup. I made it a couple days in advance and left it in the fridge once cooled.
Satsuma Curd
This was the hardest part.. First, I had to find satsumas. Found them in the third grocery store I tried (Trader Joe’s). Then I had to get some gelatin sheets, which I had never used before. Got those off Amazon.
First step, cut the gelatin sheets in ~1 inch strips and place them in cold water to start to soften.
Combine the eggs, sugar, and juices in either a double boiler, or a glass bowl set over a pot of simmering water. Cook, whisking constantly, until it has thickened and a thermometer in it reads 82C.
Let it cool for about a minute, while whisking. Squeeze the water out of the softened gelatin and add it to the curd, whisking for about another minute until it is dissolved. Strain the curd through a very fine strainer.
Use an immersion blender on low to mix in all the butter slowly, a few pieces at a time. Once all the butter is incorporated the curd is ready. You can use it immediately or refrigerate. I made it the day before and put a sheet of plastic rap on the surface of the curd to stop it from forming a skin.
The Cake
Instead of baking rounds, bake a sheet cake and cut rounds with a 6 inch cutter. The recipe in the Bouchon Bakery book fills a quarter sheet pan. Since I wanted 6 layers I made 2 batches and filled 2 1/4 sheet pans. I could only get 3 rounds per sheet with the cutter I had.
The cake is pretty straightforward..
Sift flour and baking powder into a medium bowl.
Place eggs and sugar in the bowl of a stand mixer and whisk on low for a minute. Then turn up the speed and mix for 5-10 more minutes until the mixture is thick and pale yellow.
Place the butter and glucose in a small pan over medium heat. Melt the butter and combine. Remove from the heat and whisk in the milk. Let it cool until it is just warm to the touch.
Whisk 1/4 of the egg mixture into the glucose mixture, along with the satsuma juice.Add half the dry ingredients into the mixer bowl while whisking. Once combined, add the other half of the dry and allow to mix fully.
Now pour in 1/4 of the glucose mixture and let it combine. Do this 3 more times until everything is combined in the mixer bowl.
Prepare a 1/4 sheet pan. I sprayed the inside with Pam, put down a sheet of parchment, then sprayed the parchment with Pam. Pour in the batter and even out with a spatula. Cook at 350F for 24 minutes. Once it’s done let it cool on a rack, and then in the fridge for 30 minutes to make it easier to cut into rounds.
Whipped Cream
Combine the sugar and the cream. Whip.
That’s why it’s called “whipped cream”.
Putting it Together
Spread a layer of dulce de leche on the first round. Add another round on top, and spread the curd on that one. Repeat, alternating, until you have 6 layers. Once you have the 6 layers stacked, use the remaining curd to crumbcoat the entire thing, and put it in the fridge.
After it cools about 30 minutes, “frost” the entire thing with whipped cream. Make a ring around the base with the candied kumquats, and go to town decorating as you wish!
My interest in baking was kicked off by watching the Great British Bake Off. I love Paul Hollywood. His beginner book was the first baking book I read and his basic recipes were the first I tried.
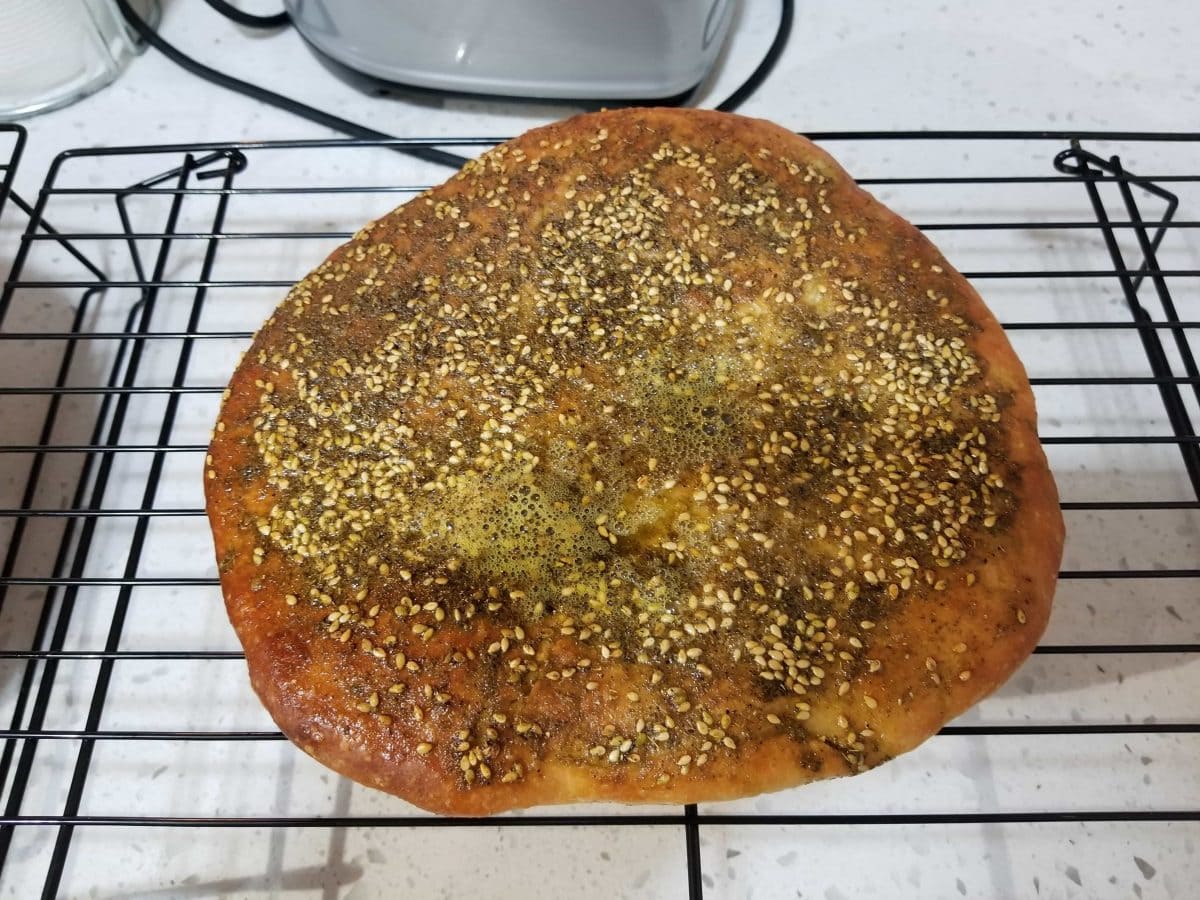
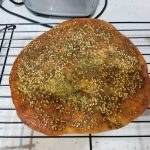
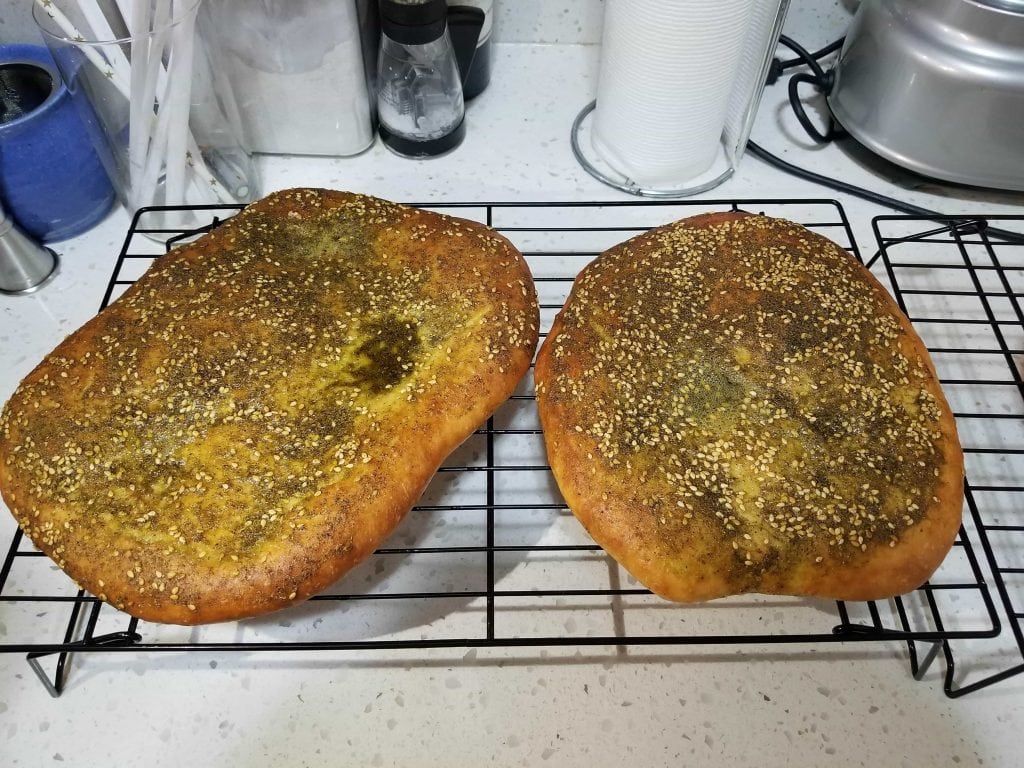
This isn’t from that book, but it’s pretty simple, and delicious. I’d never heard of maneesh before I made it, but it’s similar to other middle eastern flatbreads. I had bought some good za’atar from a local spice shop and was looking for something to use it with, and found this recipe. We served it as the focus of a mezze plate with hummus and cheese and other accouterments, but honestly I liked it best just by itself.
Za'atar Maneesh
Paul Hollywood’s Za’atar Maneesh (Lebanese flatbread)
500 g Bread Flour
10 g Salt
25 g Caster Sugar
10 g Yeast
320 ml Water ((tepid))
1/3 c Za'atar ((buy or make))
1/3 c Olive Oil
Mix flour, salt, sugar, and yeast. Add 270ml of the water and mix. Slowly add the rest of the water until the dough comes together and all the dry ingredients are incorporated. Dough should be soft and not sticky.
Knead until the dough is smooth (5-10m)
Let dough rise in an oiled boil, covered, until doubled in size.
Knock back the dough and split into 3 equal pieces. Roll the pieces into circles.
Place the circles on a lined baking tray. Place in a bag and let proof for 20 minutes.
Mix the oil and the za’atar in a bowl. Preheat oven to 450F.
Once the dough has proofed spoon a decent amount of the toping on each circle and spread with a spoon or brush.