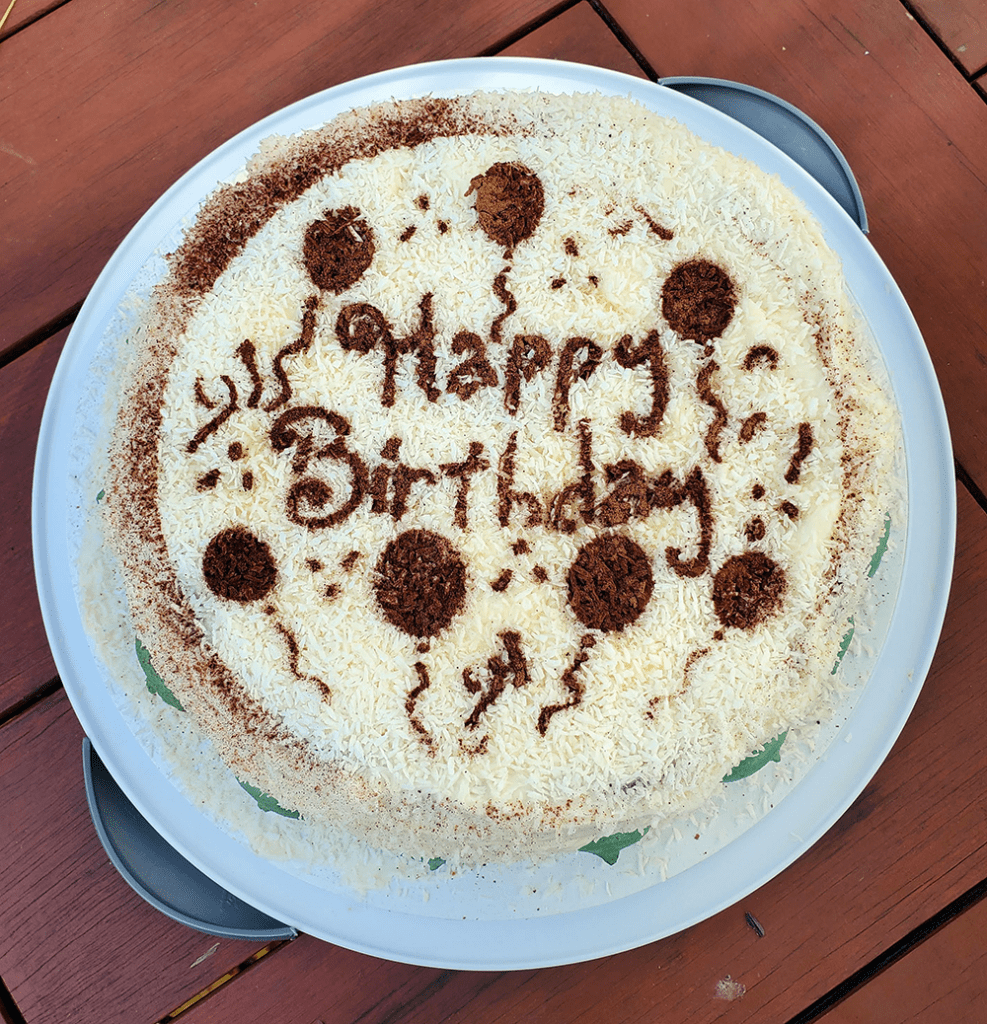
Tag: macarons

  • Lime In The Coconut

    Lime In The Coconut

    I put the lime in the coconut! For my in-law’s joint birthdays (they are like 3 days apart) they requested a coconut cake. I didn’t just want to make plain coconut cake so I brainstormed ideas with my wife. She suggested a lime/coconut cake as a good combination.

    Since I’m also trying to do a GBBO bake-along I decided to incorporate lime macarons into the cake as a decoration. The overall idea was lime macarons decorating a coconut cake, and possibly a lime buttercream layer between the layers of cake. Well, here is the story of how 4 different failures led to the cake I actually made, which miraculously was still a tasty hit.

    Lime in the Coconut
    Lime in the Coconut

    First, an embarrassingly simple failure. I made the first set of cakes following this recipe from Cooking Classy. I have no idea what I did wrong, but I ended up with sad layers about a quarter-inch thick. So I threw those away and quickly mixed up a second set. I didn’t have the right amount of coconut milk left but at least I was able to make two decent 9″ rounds of coconut-ish cake. They sunk more in the middle than I would have liked, but they were way better than the first attempt.

    Macarons

    Next, I started on the macarons. I went through a period of making macarons every week and got pretty decent at it, but I haven’t actually made any in a couple of years. Well, you can guess what happened. The first batch of shells was horrendous and all went in the trash. Then the second was less horrendous but mostly went in the trash. The third set finally gave me enough to use.

    Next up was the filling. I made a lime curd since I was making lime macarons. Well, the curd never thickened to a usable consistency. I tried assorted ways to thicken it and nothing worked. I was basically left with runny lime preserves. Without enough limes or time to try a new batch, I was in trouble. But wait – I had an idea. I’d follow the advice of the great Harry Nillson and put the lime IN the coconut!

    Lime in The Coconut

    Final Product

    So the new plan was a coconut(ish) cake, with a layer of lime preserves(ish) between cake layers, buttercream all around, covered in shredded coconut, with macaron shells as a decoration. So that’s what I did. I assembled the layers with the preserves in the middle. I piped a ring of buttercream around the edge of the first cake layer to create a wall to keep the runny filling on the cake. In addition, I used alot of buttercream all around the cake to make up for the fact that even my second attempt cake layers didn’t come out all that uniform. For the final touch, I used a stencil I had and added sprinkled cocoa powder to write out happy birthday.

    Despite all the failures along the way the cake was delicious and well-received. It even looked really nice in presenting it. It wasn’t until you cut into it that you could see there was a lot of lipstick on this pig to make it look good, as the pictures below will prove.

    Lime in the Coconut
    Lime in the Coconut
    Lime in the Coconut
    Lime in the Coconut
  • Pistachio Macarons

    Pistachio Macarons

    For my first fairly successfully macaron attempt, I made pistachio macarons. I made this on St. Patrick’s day. I’d like to say that was on purpose, but I just had a hankering for pistachio, and I was almost done by the time it occurred to me “Hey, they’re green!”.

    I got the Ladurée book for Christmas from my in-laws. It’s an absolutely gorgeous book with amazing flavor ideas. This was my third attempt at macarons. My first was a disaster. My second was tasty, but I’m not sure they qualified as macarons. So for this attempt I did a bit more research. I watched some youtube videos that helped quite a bit. I underestimated how important the whipping the meringue and carefully folding in the flour were.

    Pistachio Macarons

    Adapted from the Ladurée book by Sweet&Savory by Shinee.

    Shells

    • 60 g Almond Flour
    • 40 g Pistachio Flour ((I made my own by grinding unsalted pistachios))
    • 100 g Powdered Sugar
    • 70 g Egg White ((or 2 large))
    • 1/4 tsp Cream of Tartar
    • 50 g Caster Sugar ((usually 'Superfine' in the US))
    • Enough Green Gel Food Coloring

    Filling

    • 65 g Caster Sugar ((see above))
    • 30 ml water
    • 2 Egg Yolks
    • 55 gr Softened Butter
    • 3 tsp Pistachio Paste ((I made my own))

    Shells

    1. Sift together the flours and powdered sugar. Do this at least twice, I ended up doing it three times, twice to get it nicely combined, and once more.

    2. Beat the egg whites until foamy. I used a stand mixer. Add the cream of tartar and continue to beat. It’s important to not overbeat, but I think it’s a lot easier to underbeat. You want lots of air. Add the sugar one tablespoon at a time and beat on medium-high until you get hard peaks like you were making meringue. Add a food coloring drop by drop until you get the color you want. 

    3. Sift the premixed dry ingredients into the egg whites (fourth sifting!). Gently fold it all together with a spatula. You want to mix it absolutely as little as possible to get it completely incorporated. You’re trying not to deflate your meringue.

    4. Put the mix in a pastry bag for piping out the shells.

    5. Line 2 baking sheets, preferably with a nice silpat with macaron shapes on it, but you can also just use parchment and wing it. Pipe out about 25 rounds on each tray.

    6. Gently-ish drop the trays a couple of times to get air bubbles out. Let the shells sit for a while. There seem to be a lot of different opinions on how long. I let them sit for a good 45 minutes. The idea is that they form a bit of a crust on the top, you should be able to touch them and not make a mark.

    7. Preheat oven to 300F.

    8. Bake for 18-20 minutes. It can be tricky to judge doneness. If you can pretty easily dislodge one from the sheet without it sticking or causing a mess, they are done.

    9. Transfer to cooling racks.

    Filling

    1. In a small saucepan combine water and sugar over medium heat. Let the sugar dissolve and then bring to a boil. If you have a candy thermometer you want the syrup to hit 250F. If you don’t.. wing it.

    2. In a mixer beat the 2 egg yolks for 2 minutes. Set mixer to low and pour in the hot syrup (very carefully).

    3. Increase the speed to medium/high and beat while it all cools down. It should end up as a fairly white and smooth mixture.

    4. Add the butter 1 tbsp at a time, then add the pistachio paste and some food coloring to get the color you want.

    5. Continue beating until it is a smooth mixture. Transfer to piping bag.

    Construction

    1. Now that you have shells and a bag of filling you can put it all together. Being an amateur macaron maker, I did not have 50 identical shells. Not even close. So the first step was to enlist my wife for help matching shells that were the closest in size together. We made a bit of an assembly line. She would find a good matching pair, and I would pipe some filling on one, sandwich the other together, and set aside. In the end we had probably 20 pretty decent macarons, and five ugly ducklings that we just consumed immediately.

    2. Once finished, the macarons can survive pretty well for about 5 days in a sealed Tupperware in the fridge. You can also freeze them for months, but I’m not sure why you would want to make macarons and not eat them!

    They came out pretty nice. They definitely weren’t perfect by any means, but after only three tries I got decent results, which I think is pretty good. I’ll definitely be trying again, the Ladurée book is beautiful and has dozens of interesting flavor variations.