Blog

  • Fergazza

    Fergazza

    This might not actually be called fergazza. It might not even exist. I can’t really find any reference to it besides the recipe I found and use to make it. We subscribe to a CSA, so every summer we get a bunch of random and sometimes unusual vegetables delivered to us every week. Last summer we got garlic scapes one week. I didn’t even really know what they were, let alone what to do with them. I did some googling and found this recipe. It was an instant hit with my wife. This week I didn’t have any garlic scapes, but I did have ramps, so I decided to give it a go with those instead.

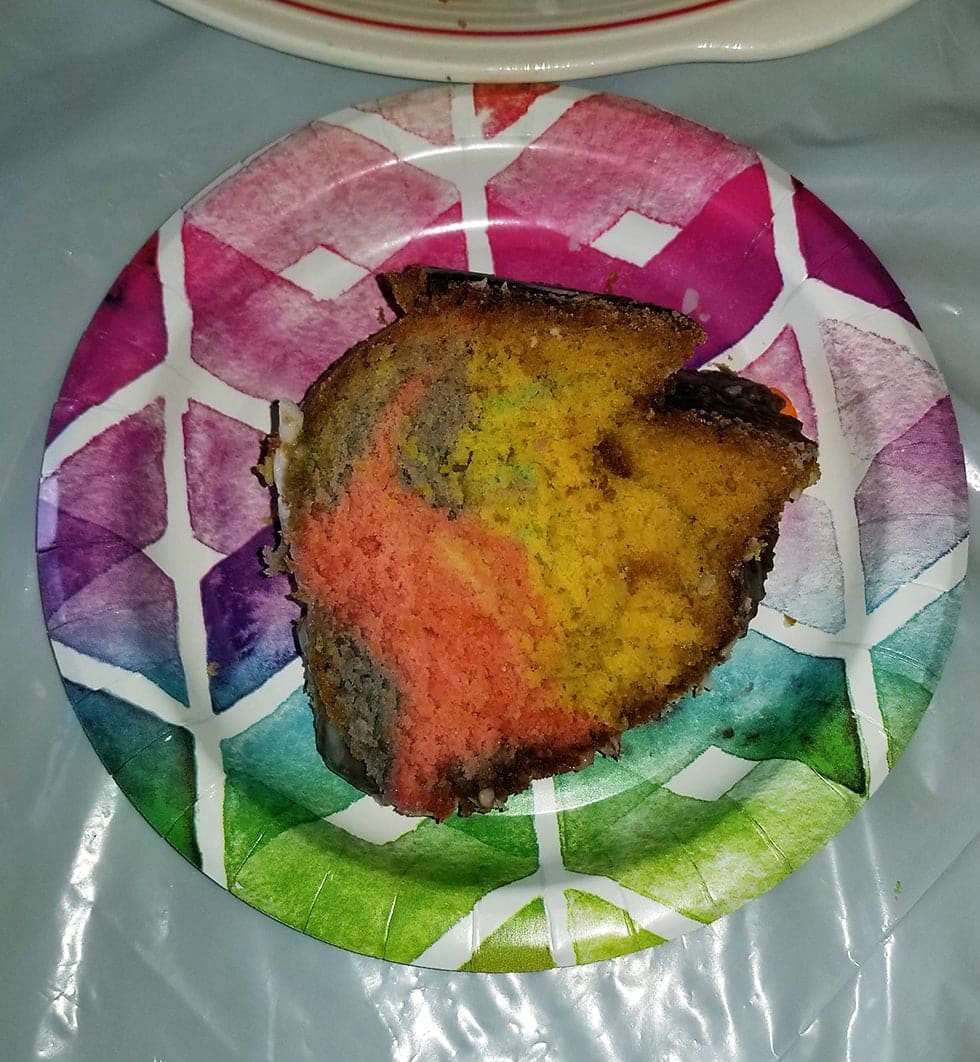
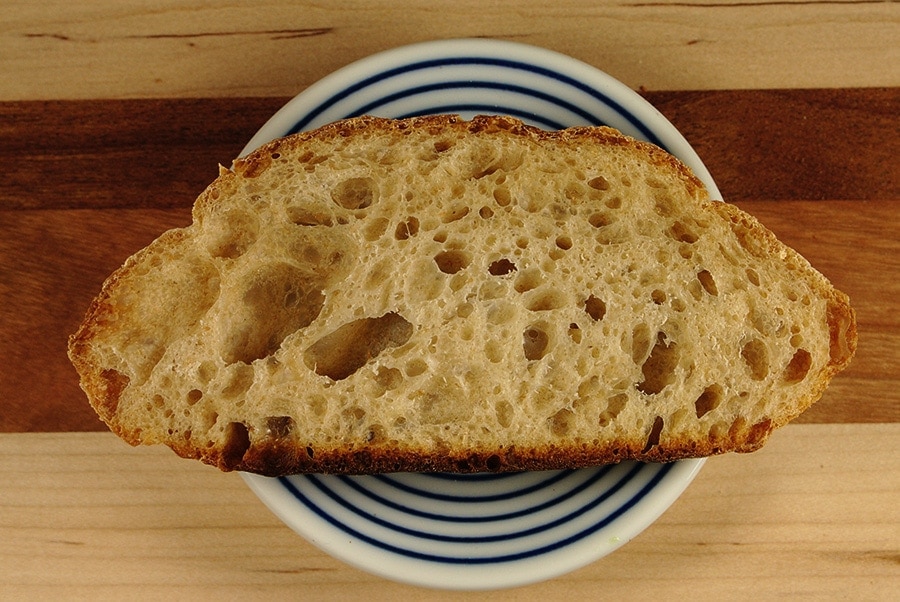
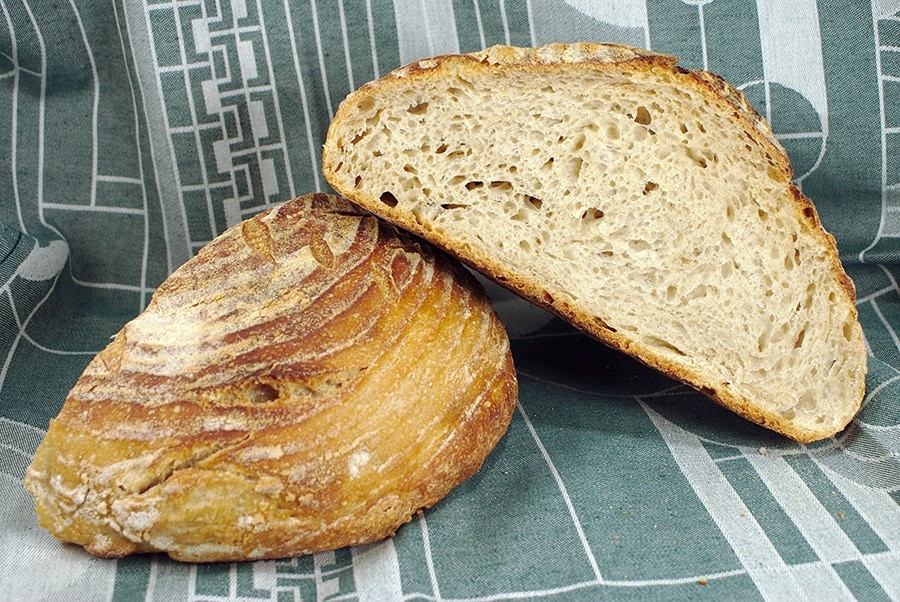
    I think the garlic scape version has a better texture. The heavier bodied scapes give a nice little bite whereas the ramps got more soft, but the taste was still great. I also had a problem with this version with it collapsing a bit (ok, a lot) in the middle, as you’ll see in the next picture..

    I suspect the higher water content of the ramps had a part to play in this, as well as possibly using a bit too much filling. I might try a bit less water next time to make up, and maybe try to roll it tighter so it has a better chance of staying together. Ideally I would just actually use garlic scapes next time, but they aren’t real easy to come by. I think the general recipe could probably be used for any sort of vegetable you want, especially something stemy. Rhubarb might make a nice dessert version. I’ll have to experiment more.
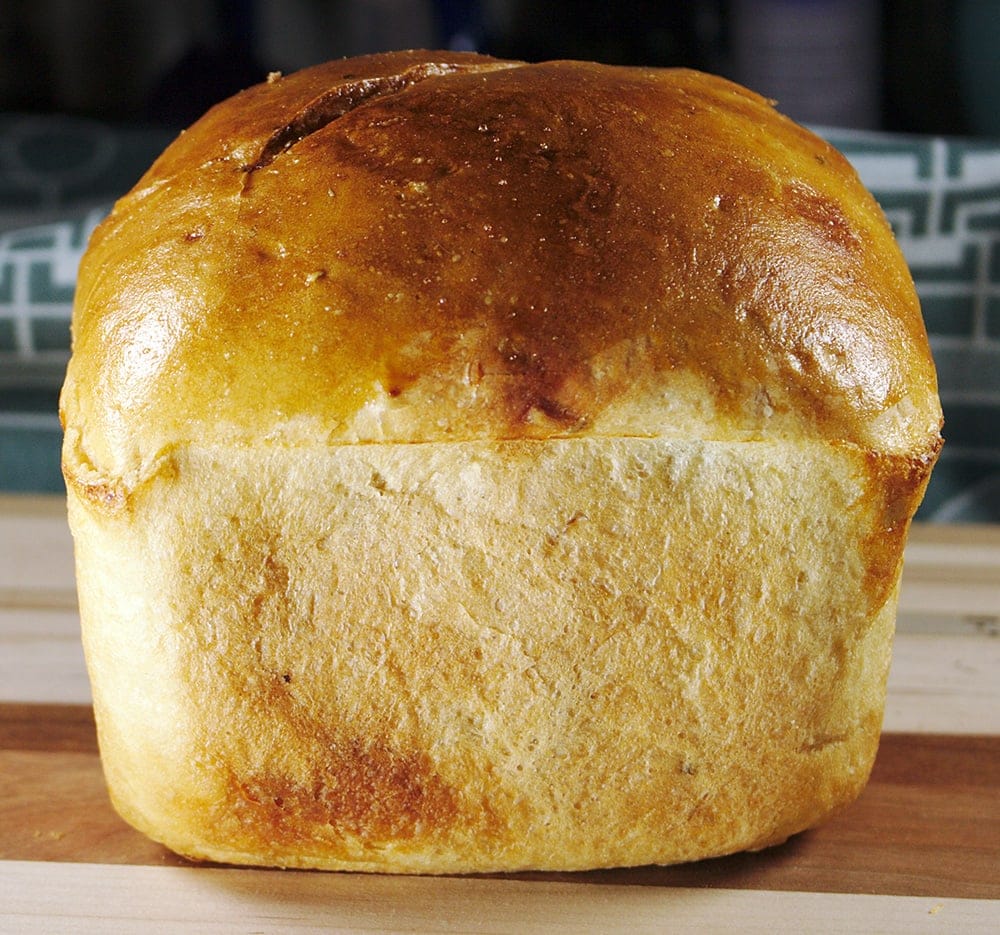
    Fergazza

    Stuffed bread with cheese, hot sauce, and garlic scapes or ramps.

    • 1 1/4 cup Lukewarm Water
    • 1 tbsp Sugar
    • 1 tsp Yeast
    • 3 cups All Purpose Flour
    • 4 tbsp Extra Virgin Olive Oil
    • 1 1/2 tsp Coarse Salt
    • 1 tsp Dried Oregano
    • 1/2 tsp Ground Black Pepper
    • 1/2 lb Shredded Sharp Cheddar
    • 1/2 cup Garlic Scapes or Ramps
    • 1 tbsp Sriracha or Hot Sauce of Choice
    • 1 clove Minced Garlic
    1. Combine the water, sugar, and yeast in the bowl of a mixer. Let sit a few minutes until foamy.

    2. Add flour, 1 tbsp olive oil, the salt, pepper, and oregano. Mix until it forms a shaggy dough.

    3. Form into a ball and place in an oiled bowl. Cover and let rise for two hours or until doubled.

    4. Mix 2 tablespoons of olive oil with the hotsauce and garlic.

    5. Flour your work surface and roll out the dough until it is about 10″x14″. Brush the hotsauce mixture over the brad. Sprinkle the cheese and vegetables evenly over the dough.

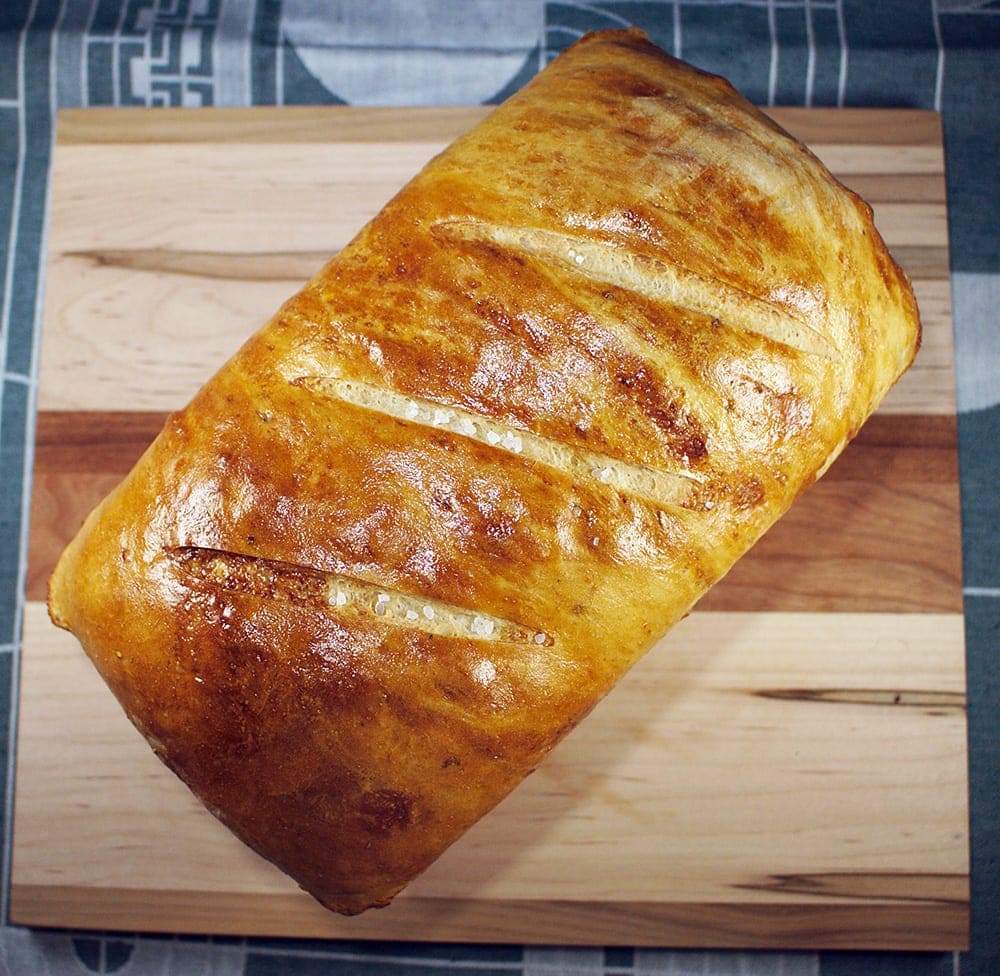
    6. Roll the dough up and fold the ends under forming a loaf. Please the loaf in a greased loaf pan and let rise another 90 minutes.

    7. Cut some slashes in the top and sprinkle with coarse salt. Cook at 350F for 45-50 minutes.

  • Easter Surprise Lemon Bundt Cake

    Easter Surprise Lemon Bundt Cake

    For Easter I baked a lemon bundt cake with a rainbow surprise. I used a recipe I found on the blog The Pudge Factor. They in turn adapted it from the King Arthur Flour Lemon Bliss Cake recipe. It took me some time to decide on something good to make for Easter. My research included Mary Berry’s Easter special. I strongly considered making her Simnel Cake, but I wasn’t really convinced everyone would like it. Marzipan is one of divisive those things like licorice that people love or hate.

    My wife suggested a bundt cake so that I could show off the fancy new bundt pan I had gotten for Christmas. So I searched a bit and settled on this lemon cake. I thought the color swirl effect would make it a showstopper, and it did.

    Easter Surprise Lemon Bundt Cake

    A lemon bundt cake with a rainbow surprise inside.

    Cake

    • 8 oz Unsalted Butter (room temperature)
    • 2 cups Granulated Sugar
    • 4 Large Eggs
    • 1 tsp Baking Powder
    • 1 tsp Salt
    • 3 cups All Purpose Flour
    • 1 cup Whole Milk
    • Zest of 2 Lemons
    • Assorted Gel Food Colorings

    Lemon Simple Syrup

    • 1/3 cup Lemon Juice
    • 3/4 cup Granulated Sugar

    Lemon Glaze

    • 1 1/2 Cups Confectioners' Sugar
    • 3 Tbsp Lemon Juice

    Cake

    1. Preheat oven to 350F

    2. Beat together butter and sugar until fluffy.

    3. Add eggs one at a time, beating well after each.

    4. Add salt and baking powder and beat until combined.

    5. Add the flour and the milk in 3 batches. Alternate 1 cup flour, 1/3 cup milk, 3 times.

    6. Add The lemon zest and mix until all combined.

    7. Split the batter into 3 or 4 equal parts, depending how many colors you plan to use. Mix a different color into each portion until you get the color you want.

    8. Grease the bundt pan. Add about half of each color of cake batter to make the first layer of batter. Use a spatula or some other tool to swirl the colors around a bit.

    9. Add the rest of the batter(s) to make a second layer. Swill this one as well. Tap the pan a few times to even it out and remove any bubbles.

    10. Bake the cake for 50-60 minutes (until a toothpick comes out cleanly).

    11. While the cake bakes, make the simple syrup. Stir together the sugar and lemon juice in a small saucepan over low heat, until the syrup has dissolved.

    12. Remove the cake when done and let it rest/cool for 5 minutes. After 5 minutes brush the lemon simple syrup all over the cake. Use all of it, this gives the cake most of it’s flavor.

    13. Let the cake cool completely.

    Glaze

    1. Mix the confectioners’ sugar and lemon juice together. You want the mixture so thick that it will just pour. Add more sugar if needed to get the consistency you want.

    2. Drizzle the glaze over the cake. Decorate with anything else you want. I added some small sugar flowers that added a nice touch.

    The swirl came out pretty good. It was uneven of course and looked better in some slices than others.

    It came out really nice, but was kind of tale of two cakes. The top, where the simple had soaked in, with the addition of the glaze, was really tasty and really lemony. As you got further down/in to the cake, it definitely lacked some punch. If I were to make it again, I’d probably add more lemon zest to the cake batter. I’d also use a skewer to make holes in the cake, to allow the syrup to penetrate the cake better. Nonetheless , I got a lot of compliments on the cake, so it was a success.

  • Sourdough Deux

    Sourdough Deux

    After another week of cultivating Ziggy Stardough, I tried my second batch of sourdough. I fell like the sourdough flavor was much more pronounced this time around. I also tried to do a more traditional scoring job and create a classic ear on the loaf.

    I’m particularly proud of the above shot because not only did I obviously bake the bread, but I also hand churned the butter, and even crafted the cutting board it’s all sitting on.

    Crumb
    “All right, Mr. DeMille, I’m ready for my close-up.”
  • Pistachio Macarons

    Pistachio Macarons

    For my first fairly successfully macaron attempt, I made pistachio macarons. I made this on St. Patrick’s day. I’d like to say that was on purpose, but I just had a hankering for pistachio, and I was almost done by the time it occurred to me “Hey, they’re green!”.

    I got the Ladurée book for Christmas from my in-laws. It’s an absolutely gorgeous book with amazing flavor ideas. This was my third attempt at macarons. My first was a disaster. My second was tasty, but I’m not sure they qualified as macarons. So for this attempt I did a bit more research. I watched some youtube videos that helped quite a bit. I underestimated how important the whipping the meringue and carefully folding in the flour were.

    Pistachio Macarons

    Adapted from the Ladurée book by Sweet&Savory by Shinee.

    Shells

    • 60 g Almond Flour
    • 40 g Pistachio Flour ((I made my own by grinding unsalted pistachios))
    • 100 g Powdered Sugar
    • 70 g Egg White ((or 2 large))
    • 1/4 tsp Cream of Tartar
    • 50 g Caster Sugar ((usually 'Superfine' in the US))
    • Enough Green Gel Food Coloring

    Filling

    • 65 g Caster Sugar ((see above))
    • 30 ml water
    • 2 Egg Yolks
    • 55 gr Softened Butter
    • 3 tsp Pistachio Paste ((I made my own))

    Shells

    1. Sift together the flours and powdered sugar. Do this at least twice, I ended up doing it three times, twice to get it nicely combined, and once more.

    2. Beat the egg whites until foamy. I used a stand mixer. Add the cream of tartar and continue to beat. It’s important to not overbeat, but I think it’s a lot easier to underbeat. You want lots of air. Add the sugar one tablespoon at a time and beat on medium-high until you get hard peaks like you were making meringue. Add a food coloring drop by drop until you get the color you want. 

    3. Sift the premixed dry ingredients into the egg whites (fourth sifting!). Gently fold it all together with a spatula. You want to mix it absolutely as little as possible to get it completely incorporated. You’re trying not to deflate your meringue.

    4. Put the mix in a pastry bag for piping out the shells.

    5. Line 2 baking sheets, preferably with a nice silpat with macaron shapes on it, but you can also just use parchment and wing it. Pipe out about 25 rounds on each tray.

    6. Gently-ish drop the trays a couple of times to get air bubbles out. Let the shells sit for a while. There seem to be a lot of different opinions on how long. I let them sit for a good 45 minutes. The idea is that they form a bit of a crust on the top, you should be able to touch them and not make a mark.

    7. Preheat oven to 300F.

    8. Bake for 18-20 minutes. It can be tricky to judge doneness. If you can pretty easily dislodge one from the sheet without it sticking or causing a mess, they are done.

    9. Transfer to cooling racks.

    Filling

    1. In a small saucepan combine water and sugar over medium heat. Let the sugar dissolve and then bring to a boil. If you have a candy thermometer you want the syrup to hit 250F. If you don’t.. wing it.

    2. In a mixer beat the 2 egg yolks for 2 minutes. Set mixer to low and pour in the hot syrup (very carefully).

    3. Increase the speed to medium/high and beat while it all cools down. It should end up as a fairly white and smooth mixture.

    4. Add the butter 1 tbsp at a time, then add the pistachio paste and some food coloring to get the color you want.

    5. Continue beating until it is a smooth mixture. Transfer to piping bag.

    Construction

    1. Now that you have shells and a bag of filling you can put it all together. Being an amateur macaron maker, I did not have 50 identical shells. Not even close. So the first step was to enlist my wife for help matching shells that were the closest in size together. We made a bit of an assembly line. She would find a good matching pair, and I would pipe some filling on one, sandwich the other together, and set aside. In the end we had probably 20 pretty decent macarons, and five ugly ducklings that we just consumed immediately.

    2. Once finished, the macarons can survive pretty well for about 5 days in a sealed Tupperware in the fridge. You can also freeze them for months, but I’m not sure why you would want to make macarons and not eat them!

    They came out pretty nice. They definitely weren’t perfect by any means, but after only three tries I got decent results, which I think is pretty good. I’ll definitely be trying again, the Ladurée book is beautiful and has dozens of interesting flavor variations.

  • First Sourdough!!

    First Sourdough!!

    I finally baked my first sourdough. A sourdough starter is basically a pet. People keep them alive for years, or generations. There is a starter that was brought cross country on the Oregon trail in the 1800s that a group of people are still keeping alive today. At the famous Boudin bakery in San Francisco their starter has been around since 1849, and survived the 1906 “Great Earthquake”. So yeah, starters can be pretty serious business. My wife and I already have three fur babies, so another pet is a commitment. I finally took the plunge two weeks ago. Following the King Arthur Flour recipe and care instructions, I established a starter. I have dubbed him Ziggy Stardough. He lives in a glass jar on the kitchen counter for now, but I’m still figuring out the details of long term accommodations.

    This weekend I decided the starter was good and established enough to bake my first loaf. I followed the recipe from Brooklyn Sourdough, who’s Instagram you should follow if you don’t already. She does amazing scoring work and produces beautiful loaves.

    No Knead Sourdough

    From Brooklyn Sourdough.

    • 80 g Whole Wheat Flour
    • 320 g Bread Flour
    • 272 ml Water
    • 240 g Starter
    • 8 g Salt

    Day 1

    1. Autolyse. Combine all the flours and the water, mix, and let stand covered at least 30 minutes.

    2. Mix the starter into the flour and water mixture, and let sit another 30 minutes. (you probably wan’t to feed / replenish your starter after taking the 240 grams)

    3. Sprinkle the salt on top and fold and pincer it in. Let set, covered, for 1 hour.

    4. Perform 3 stretch and folds of the dough, 1 ever 30 minutes, for 90 minutes. Let sit another 30 minutes when done.

    5. Flour (with rice flour or something low in gluten) a banneton. Place the loaf in the banneton. Leave to rise in the fridge, covered, for 12-20 hours. (I just baked when convenient the next day, which was about 17 hours)

    Day 2 (Baking)

    1. Place a dutch oven in the oven and preheat to 500F.

    2. Turn the dough out onto parchment paper that you have sprayed with some water.

    3. Score the loaf as you’d like, if you’d like.

    4. Using the parchment to lift the dough, carefully place it in the preheated dutch oven.

    5. Lower the oven to 450F and bake, covered, for 30 minutes.

    6. Remove lid and cook another 15 minutes.

    7. Carefully remove from the dutch oven, discard the paper, and let cool as long as you can stand.

    It came out beautifully, one of the nicest looking loaves I’ve ever made. It tasted pretty great too. The texture was decent, the dough didn’t rise as much as I would have liked, so I’ll need to experiment. Despite that, it wasn’t really dense or stodgy, just not quite as loos and fluffy as I’d like. I can’t wait to do more experiments with different variations, and to work on my scoring skills.

    Why yes, I did stand on a chair to take this phot.
    The money shot.
    Look at the ridges!