Blog

  • Sourdough Deux

    Sourdough Deux

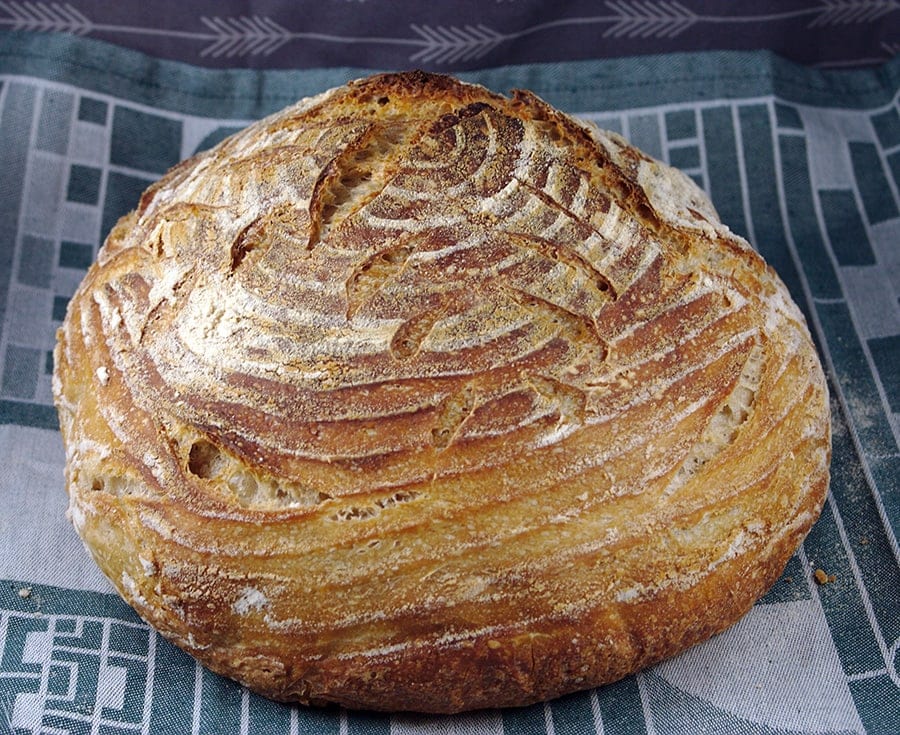
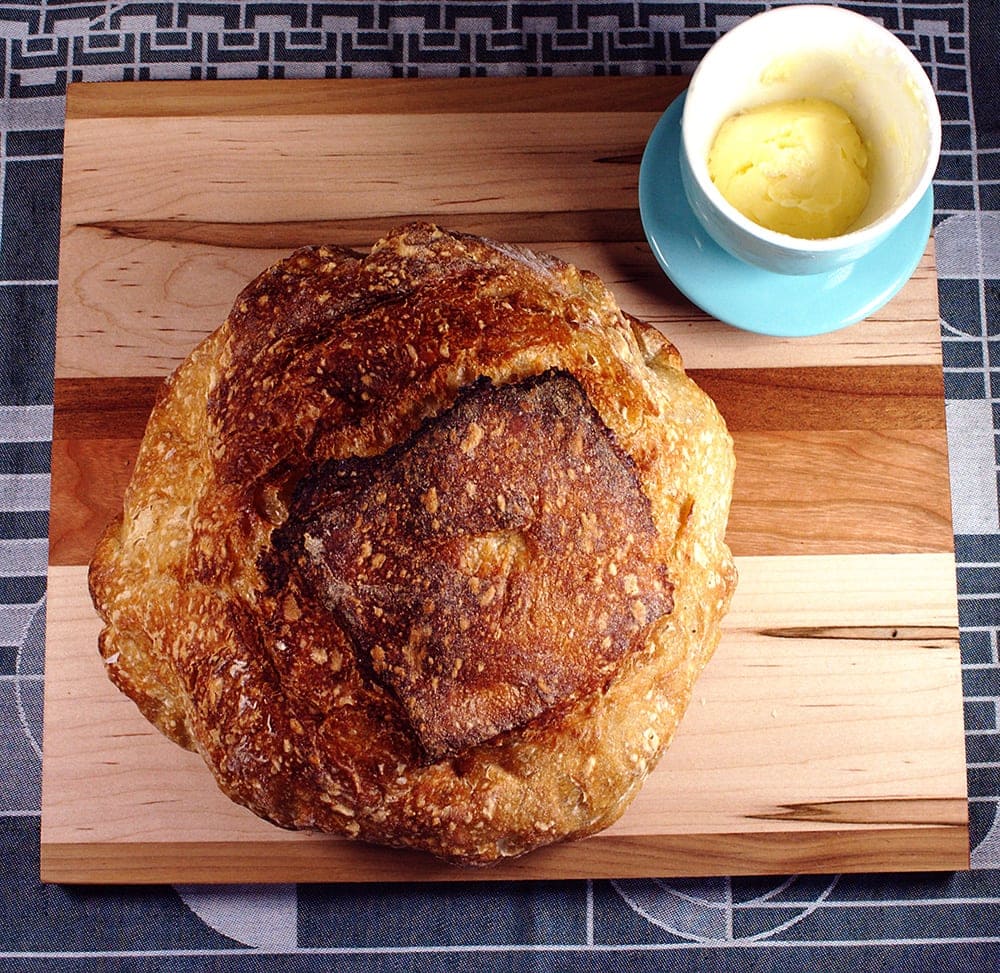
    After another week of cultivating Ziggy Stardough, I tried my second batch of sourdough. I fell like the sourdough flavor was much more pronounced this time around. I also tried to do a more traditional scoring job and create a classic ear on the loaf.

    I’m particularly proud of the above shot because not only did I obviously bake the bread, but I also hand churned the butter, and even crafted the cutting board it’s all sitting on.

    Crumb
    “All right, Mr. DeMille, I’m ready for my close-up.”
  • Pistachio Macarons

    Pistachio Macarons

    For my first fairly successfully macaron attempt, I made pistachio macarons. I made this on St. Patrick’s day. I’d like to say that was on purpose, but I just had a hankering for pistachio, and I was almost done by the time it occurred to me “Hey, they’re green!”.

    I got the Ladurée book for Christmas from my in-laws. It’s an absolutely gorgeous book with amazing flavor ideas. This was my third attempt at macarons. My first was a disaster. My second was tasty, but I’m not sure they qualified as macarons. So for this attempt I did a bit more research. I watched some youtube videos that helped quite a bit. I underestimated how important the whipping the meringue and carefully folding in the flour were.

    Pistachio Macarons

    Adapted from the Ladurée book by Sweet&Savory by Shinee.

    Shells

    • 60 g Almond Flour
    • 40 g Pistachio Flour ((I made my own by grinding unsalted pistachios))
    • 100 g Powdered Sugar
    • 70 g Egg White ((or 2 large))
    • 1/4 tsp Cream of Tartar
    • 50 g Caster Sugar ((usually 'Superfine' in the US))
    • Enough Green Gel Food Coloring

    Filling

    • 65 g Caster Sugar ((see above))
    • 30 ml water
    • 2 Egg Yolks
    • 55 gr Softened Butter
    • 3 tsp Pistachio Paste ((I made my own))

    Shells

    1. Sift together the flours and powdered sugar. Do this at least twice, I ended up doing it three times, twice to get it nicely combined, and once more.

    2. Beat the egg whites until foamy. I used a stand mixer. Add the cream of tartar and continue to beat. It’s important to not overbeat, but I think it’s a lot easier to underbeat. You want lots of air. Add the sugar one tablespoon at a time and beat on medium-high until you get hard peaks like you were making meringue. Add a food coloring drop by drop until you get the color you want. 

    3. Sift the premixed dry ingredients into the egg whites (fourth sifting!). Gently fold it all together with a spatula. You want to mix it absolutely as little as possible to get it completely incorporated. You’re trying not to deflate your meringue.

    4. Put the mix in a pastry bag for piping out the shells.

    5. Line 2 baking sheets, preferably with a nice silpat with macaron shapes on it, but you can also just use parchment and wing it. Pipe out about 25 rounds on each tray.

    6. Gently-ish drop the trays a couple of times to get air bubbles out. Let the shells sit for a while. There seem to be a lot of different opinions on how long. I let them sit for a good 45 minutes. The idea is that they form a bit of a crust on the top, you should be able to touch them and not make a mark.

    7. Preheat oven to 300F.

    8. Bake for 18-20 minutes. It can be tricky to judge doneness. If you can pretty easily dislodge one from the sheet without it sticking or causing a mess, they are done.

    9. Transfer to cooling racks.

    Filling

    1. In a small saucepan combine water and sugar over medium heat. Let the sugar dissolve and then bring to a boil. If you have a candy thermometer you want the syrup to hit 250F. If you don’t.. wing it.

    2. In a mixer beat the 2 egg yolks for 2 minutes. Set mixer to low and pour in the hot syrup (very carefully).

    3. Increase the speed to medium/high and beat while it all cools down. It should end up as a fairly white and smooth mixture.

    4. Add the butter 1 tbsp at a time, then add the pistachio paste and some food coloring to get the color you want.

    5. Continue beating until it is a smooth mixture. Transfer to piping bag.

    Construction

    1. Now that you have shells and a bag of filling you can put it all together. Being an amateur macaron maker, I did not have 50 identical shells. Not even close. So the first step was to enlist my wife for help matching shells that were the closest in size together. We made a bit of an assembly line. She would find a good matching pair, and I would pipe some filling on one, sandwich the other together, and set aside. In the end we had probably 20 pretty decent macarons, and five ugly ducklings that we just consumed immediately.

    2. Once finished, the macarons can survive pretty well for about 5 days in a sealed Tupperware in the fridge. You can also freeze them for months, but I’m not sure why you would want to make macarons and not eat them!

    They came out pretty nice. They definitely weren’t perfect by any means, but after only three tries I got decent results, which I think is pretty good. I’ll definitely be trying again, the Ladurée book is beautiful and has dozens of interesting flavor variations.

  • First Sourdough!!

    First Sourdough!!

    I finally baked my first sourdough. A sourdough starter is basically a pet. People keep them alive for years, or generations. There is a starter that was brought cross country on the Oregon trail in the 1800s that a group of people are still keeping alive today. At the famous Boudin bakery in San Francisco their starter has been around since 1849, and survived the 1906 “Great Earthquake”. So yeah, starters can be pretty serious business. My wife and I already have three fur babies, so another pet is a commitment. I finally took the plunge two weeks ago. Following the King Arthur Flour recipe and care instructions, I established a starter. I have dubbed him Ziggy Stardough. He lives in a glass jar on the kitchen counter for now, but I’m still figuring out the details of long term accommodations.

    This weekend I decided the starter was good and established enough to bake my first loaf. I followed the recipe from Brooklyn Sourdough, who’s Instagram you should follow if you don’t already. She does amazing scoring work and produces beautiful loaves.

    No Knead Sourdough

    From Brooklyn Sourdough.

    • 80 g Whole Wheat Flour
    • 320 g Bread Flour
    • 272 ml Water
    • 240 g Starter
    • 8 g Salt

    Day 1

    1. Autolyse. Combine all the flours and the water, mix, and let stand covered at least 30 minutes.

    2. Mix the starter into the flour and water mixture, and let sit another 30 minutes. (you probably wan’t to feed / replenish your starter after taking the 240 grams)

    3. Sprinkle the salt on top and fold and pincer it in. Let set, covered, for 1 hour.

    4. Perform 3 stretch and folds of the dough, 1 ever 30 minutes, for 90 minutes. Let sit another 30 minutes when done.

    5. Flour (with rice flour or something low in gluten) a banneton. Place the loaf in the banneton. Leave to rise in the fridge, covered, for 12-20 hours. (I just baked when convenient the next day, which was about 17 hours)

    Day 2 (Baking)

    1. Place a dutch oven in the oven and preheat to 500F.

    2. Turn the dough out onto parchment paper that you have sprayed with some water.

    3. Score the loaf as you’d like, if you’d like.

    4. Using the parchment to lift the dough, carefully place it in the preheated dutch oven.

    5. Lower the oven to 450F and bake, covered, for 30 minutes.

    6. Remove lid and cook another 15 minutes.

    7. Carefully remove from the dutch oven, discard the paper, and let cool as long as you can stand.

    It came out beautifully, one of the nicest looking loaves I’ve ever made. It tasted pretty great too. The texture was decent, the dough didn’t rise as much as I would have liked, so I’ll need to experiment. Despite that, it wasn’t really dense or stodgy, just not quite as loos and fluffy as I’d like. I can’t wait to do more experiments with different variations, and to work on my scoring skills.

    Why yes, I did stand on a chair to take this phot.
    The money shot.
    Look at the ridges!
  • Overnight White

    Overnight White

    I started baking bread after being inspired by Paul Hollywood. Paul is a very old school, knead it by hand until your hands are aching kind of guy. It can be, frankly, a pain in the butt. As I read more about baking on reddit and other websites, I started seeing people talking reverently about ‘FWSY’ and no-knead bread. The ubiquitous ‘FWSY’ turns out to be shorthand for ‘Flour, Water, Salt, Yeast’, a book by Ken Forkish, owner of Ken’s Artisan Bakery in Portland, which has become sort of the new testament of bread baking for a lot of people.

    Ken’s technique centers around a few concepts that differ from a lot of traditional methods. First, it uses a very small amount of yeast. Instead of spending a long time kneading the dough you only fold it just enough to mix the ingredients fully. The proofing times are very long, these are not breads you make in one day. Lastly, the loaves are cooked at high temperature, and in a dutch oven that is fully preheated.

    Well.. It works. It’s time consuming, but really amazingly simple and easy. The results are always great, even when I manage to screw it up somehow, the worse that happens is I get a really ugly but tasty and crusty loaf.

    Overnight White

    From FWSY.

    • 1000 g Bread Flour
    • 780 g Water (Lukewarm (90-95F))
    • 22 g Fine Sea Salt
    • 1/4 tsp Yeast
    1. Combine the flour and the water in a big tub and mix to incorporate. Let it sit for about 30 minutes.

    2. Sprinkle the salt and the yeast over the top (but don’t let the yeast and the salt touch directly). Mix it all together with some folds initially, then with the pincer method.

    3. Let it rest for about an hour, then fold two or three more times. Cover and let proof overnight 11-13 hours more (12-14 total). Dough should be at least 2x and up to 3x as large.

    4. Tip the dough out onto a floured surface. Cut it into two equal parts. Form each part into a nice ball.

    5. Dust and/or oil two proofing baskets or bowls. Place one dough ball in each basket.

    6. Cover the bowls with a towel and proof the loaves for another hour and fifteen minutes.

    7. 45 minutes before the loaves are done proofing, preheat an oven to 475 degrees, with 2 dutch ovens inside (if you only have 1 it’s ok, see note later..).

    8. When proofing is done, carefully remove the hot dutch ovens, place a loaf in each, cover, and put them back in the oven. Let cook for 35 minutes covered.

    9. After 35 minutes, remove the tops and cook uncovered for another 15 minutes. Very, very, very, carefully tip the loaves out of the dutch ovens and let cool for at least 20 minutes.

    10. NOTE: If you only have 1 dutch oven, put the second loaf in the fridge while the first cooks. When the first loaf is done, let the dutch oven reheat for 5 minutes in the oven, and cook the second loaf, as above.

  • 100% Spelt Bread

    100% Spelt Bread

    I’ve made spelt bread before, but it was always a percent of spelt flour mixed with white or wheat. This is my first time baking an all spelt loaf. I am very pleased with results. It’s healthier than a regular white sandwich bread, with a nice flavor that is subtlety different.

    The Delft Blue plate in the photos is a souvenir from a recent trip to Curacao. The trip was amazing, but that’s a post for a different blog.

    This recipe makes three loaves, which is a lot. You can use simple math to make two or just one instead. I wanted to experiment with different toppings, so I made a bunch of loaves.

    All Spelt Bread

    100% spelt flour loaf.

    Yeast Mix

    • 2 tbsp Yeast
    • 3/4 cup Warm Water
    • 1/4 cup Honey

    Dough

    • 2 2/3 cup Warm Water
    • 1 tbsp Salt
    • 9 cup Spelt Flour
    • 9 tbsp Olive Oil

    Optional

    • 1 tbsp Cold Water ((for egg wash))
    • some seeds/oats/anything to top the loaf

    Yeast Mix

    1. Mix 3/4 cup warm water, 1/4 cup honey and 2 tbsp of yeast in a bowl and let sit for a few minutes.

    Dough

    1. Add the yeast mix and half the flour into a large bowl (or stand mixer). Stir well.

    2. When the yeast mix and half the flour are well mixed, add the rest of the flour. I combined everything with the stand mixer for a few minutes then took the dough out and kneaded by hand for about 5 more minutes.

    Proofing

    1. Preheat oven to 200F. Once it is up to temperature turn it off. Place the dough in an oiled ovensafe dough and let proof in the warm oven for about an hour. (Should double or more)

    2. Punch the dough down and split in three equal parts.

    3. Fold each piece into a loaf shape and place in a greased loaf pan.

    4. Let the dough proof again, covered and not in the oven this time, for another hour or so. Dough should fill or overfill the loaf pans when done proofing.

    Baking

    1. Preheat oven to 425F.

    2. Optional – Egg wash and sprinkle outs or some other grain on top of loafs if desired.

    3. Bake for ~22 minutes.

    Slices beautifully.